How To
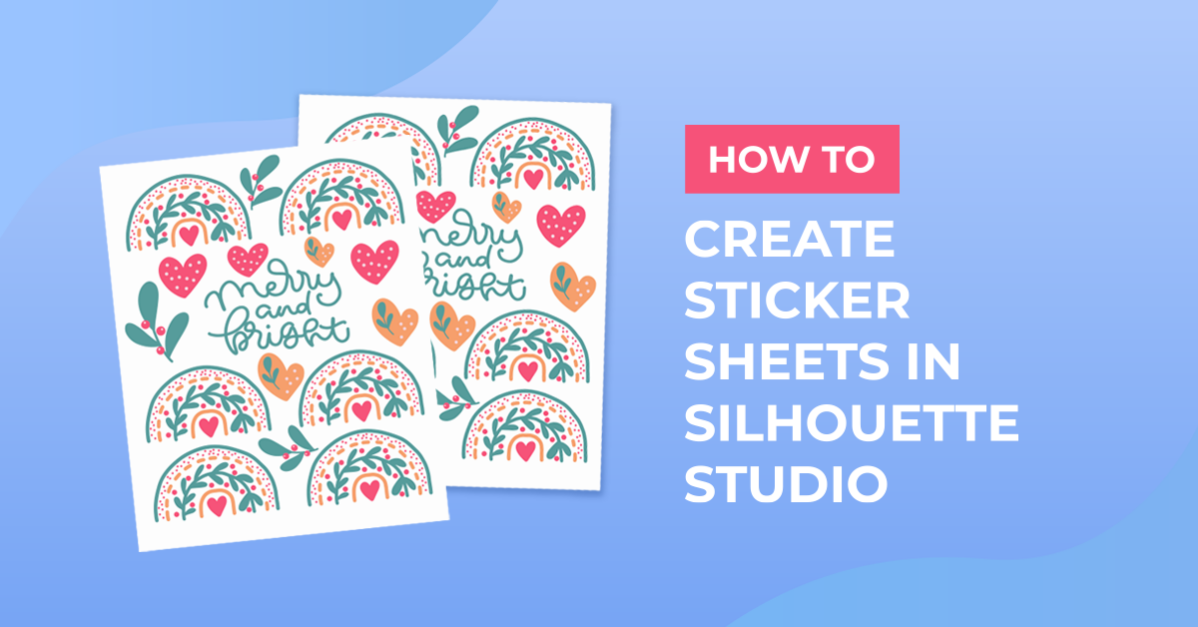
How to Create a Sheet of Stickers in Silhouette Studio
Aug
In this informative tutorial, we’ll show you how to create a sheet of stickers in Silhouette Studio, perfect for planners, gift tags, address labels, product labels, and more. With the right setup and techniques, you’ll be able to efficiently add cut lines, fill the page with stickers, and seamlessly print and cut your creations.
Follow our step-by-step instructions to learn how to set up your sticker sheet, add the necessary cut lines, and arrange your stickers on the page for optimal printing and cutting. Whether you’re crafting for personal use or running a small business, this tutorial will equip you with the skills to produce beautiful and professional-looking sticker sheets.
Let’s dive into the world of sticker crafting in Silhouette Studio and unlock the potential for endless creativity. Get ready to design and produce your own custom sticker sheets with ease and precision!
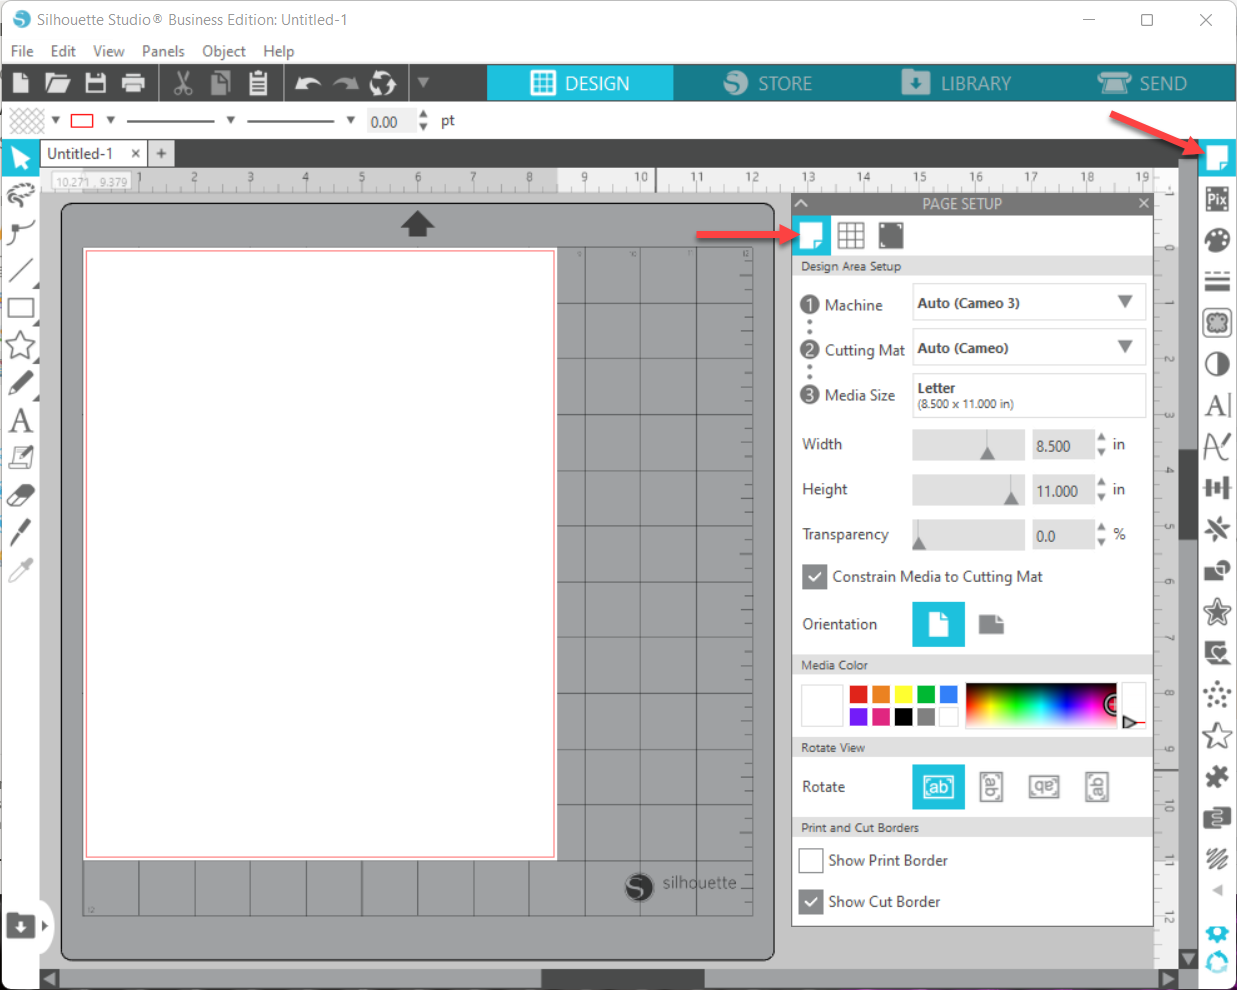
Step 1 – Set Up the Page Design Area
With a new document opened in Silhouette Studio, click the Page Setup icon on the right. In the Design Area Setup section, set the Media Size to the size of your sticker sheet. We’ll be printing on 8.5×11 inch sticker paper, so we set the Media Size to Letter.
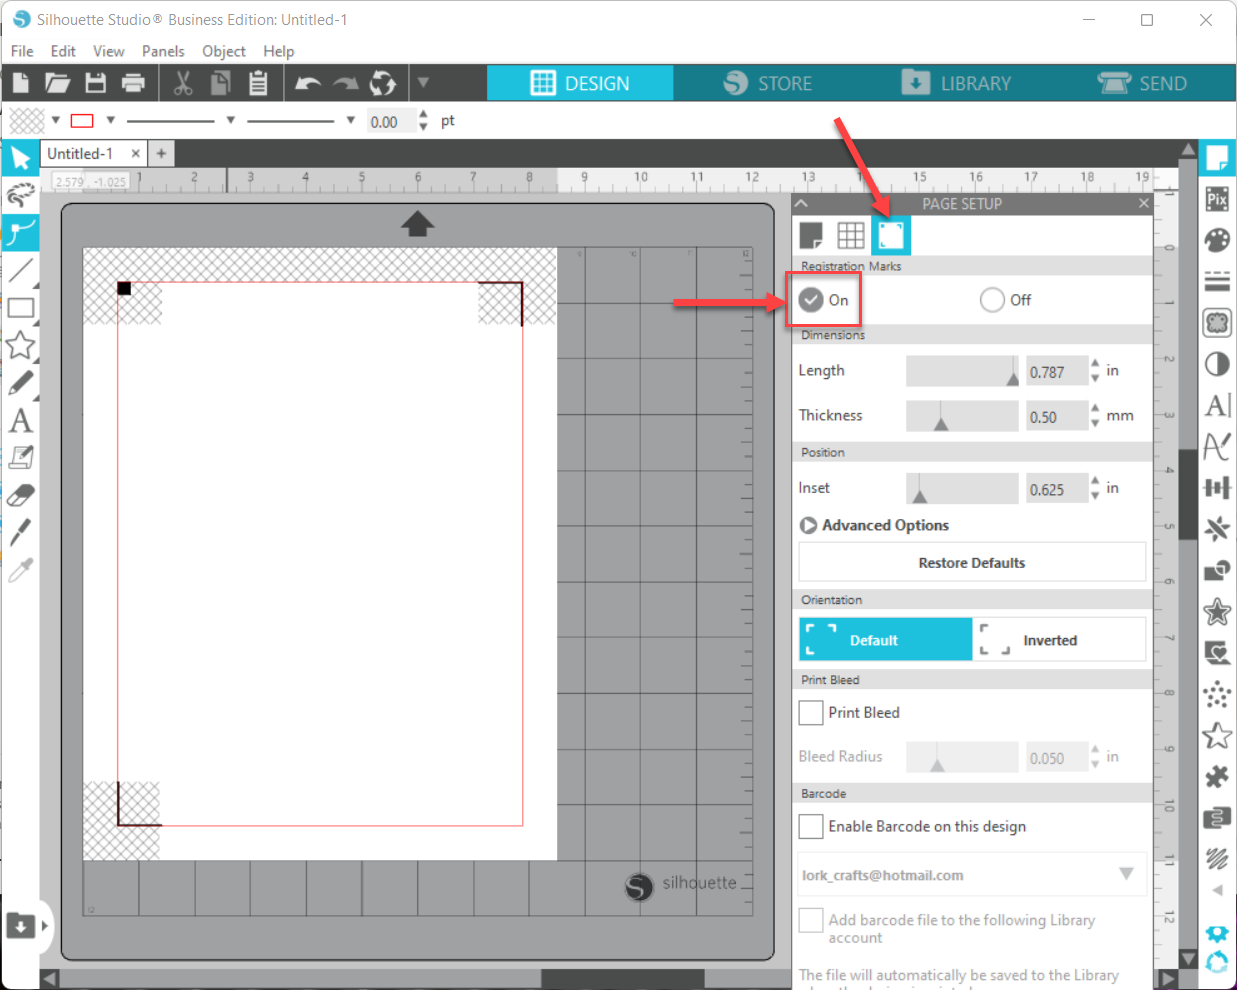
Step 2 – Enable Registration Marks
Next, select the Registration Marks icon and click On to enable registration marks. This will allow you to print and cut your stickers. Your registration marks will appear on the workspace. You can change the settings, but we’ll leave ours at the default settings.
Step 3 – Add Your Sticker Design
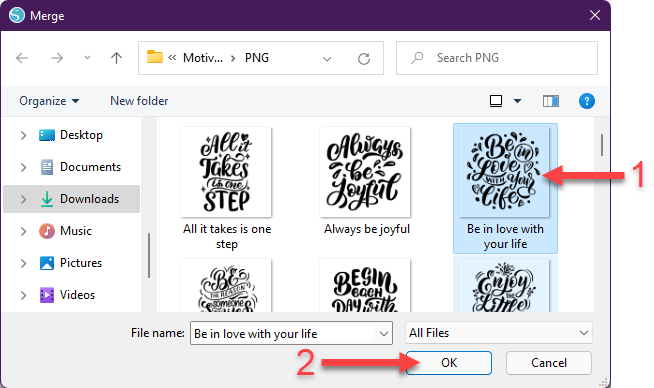
Click File > Merge.
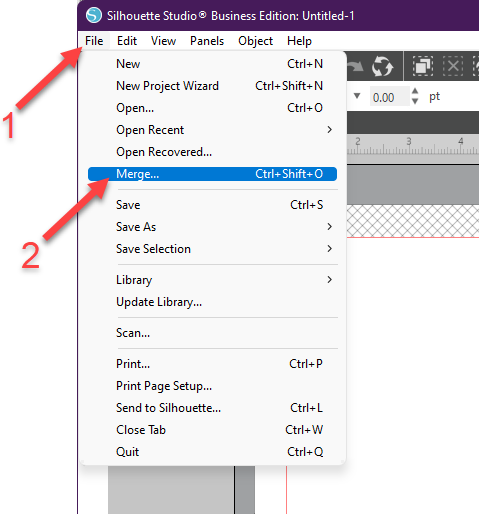
Then locate and select your design file, and click OK.
Step 4 – Resize the Sticker Design
Select your design and click + drag a corner handle to resize.
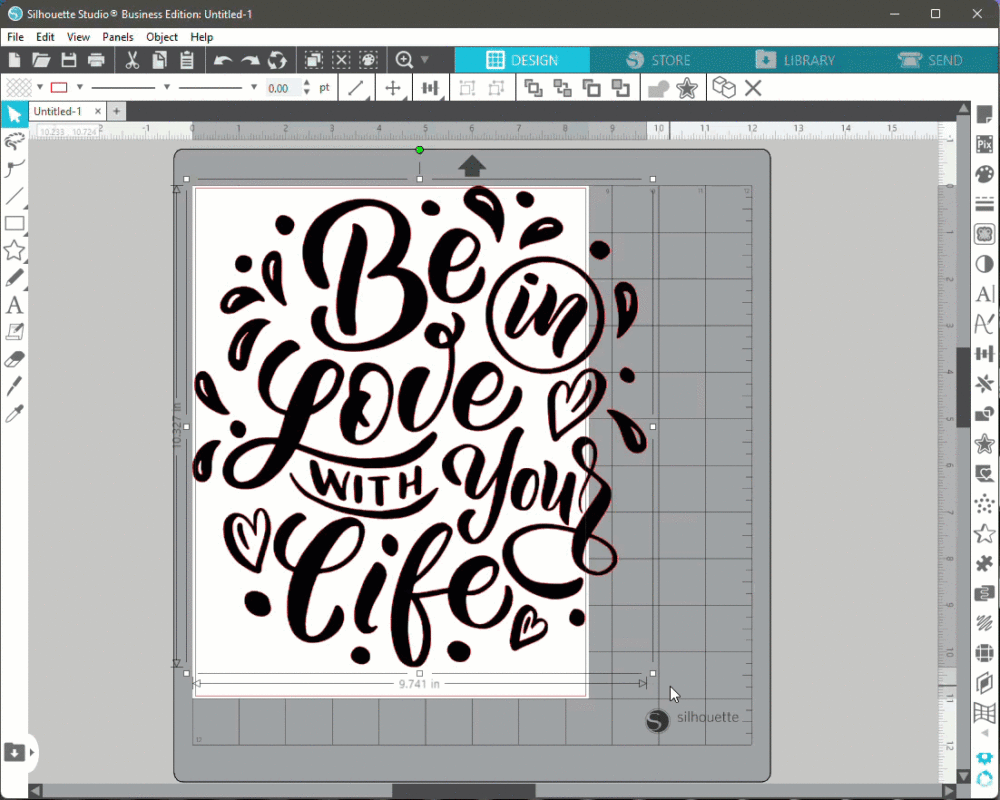
You can also change the Width and Height under the Specify Dimensions section in the Transform panel to resize the design. Make sure the padlock icon is locked before changing the width or height option. Click Apply to commit the changes.

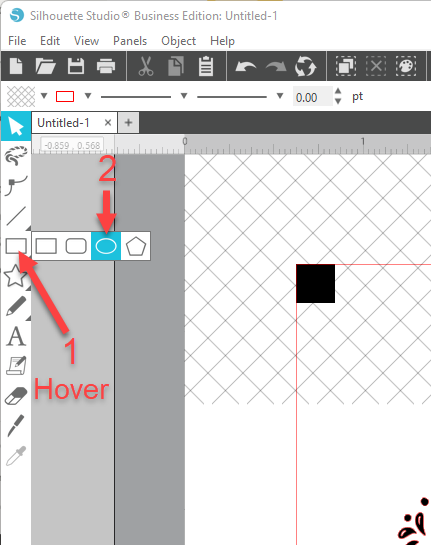
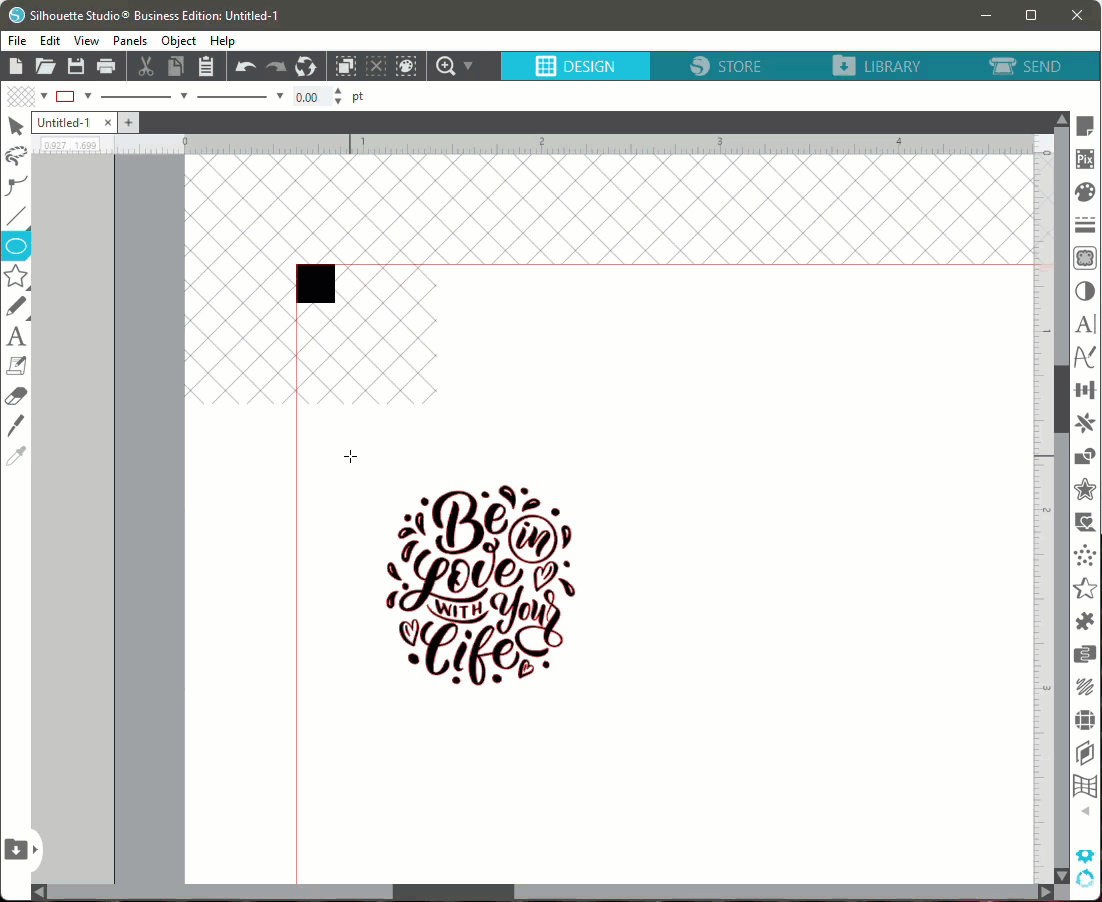
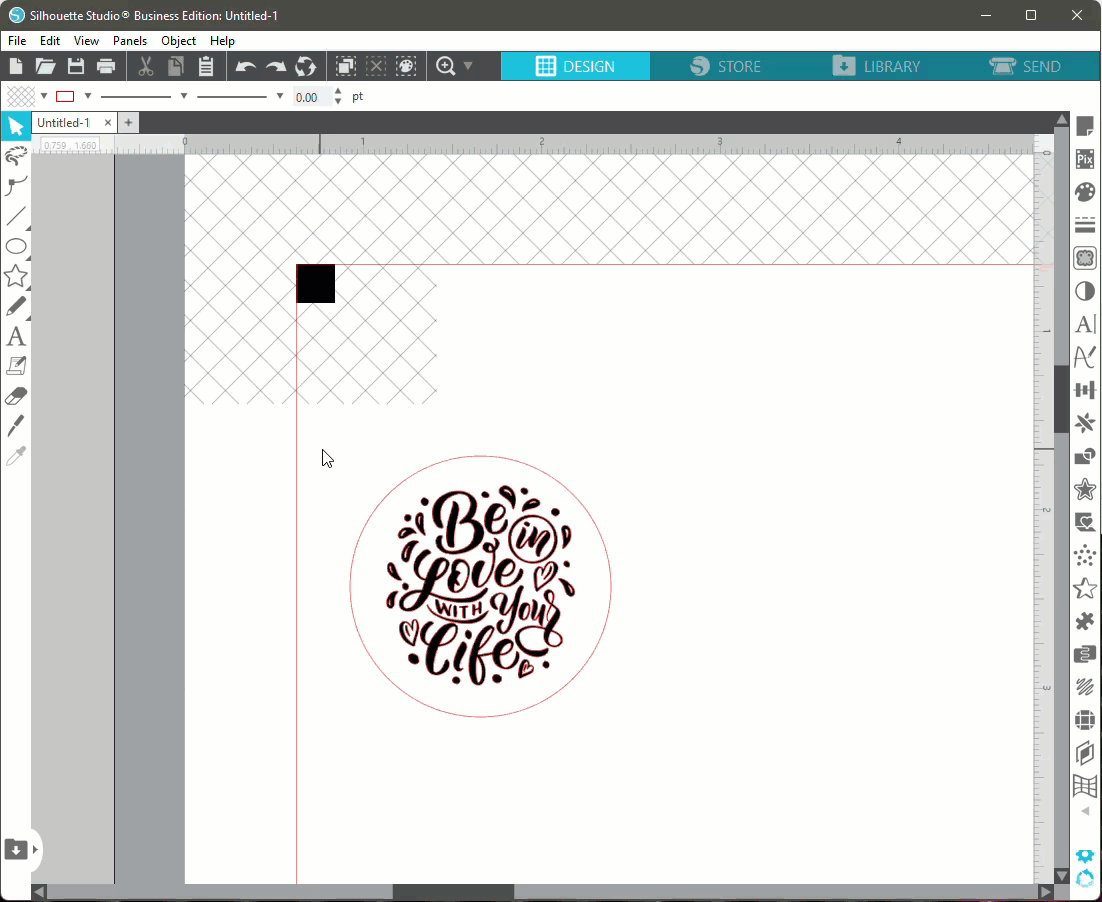
Step 5 – Draw a Circle Around the Image
Hover over the current shape tool icon on the left and select the Ellipse Tool.
Hold down the Shift key and click + drag to draw your circle around the design.
Step 6 – Align the Sticker Design to the Center of the Circle
Select the design and the circle and hover over the Align tool icon in the Quick Access Tool Bar. Then select Align Center and Align Middle.
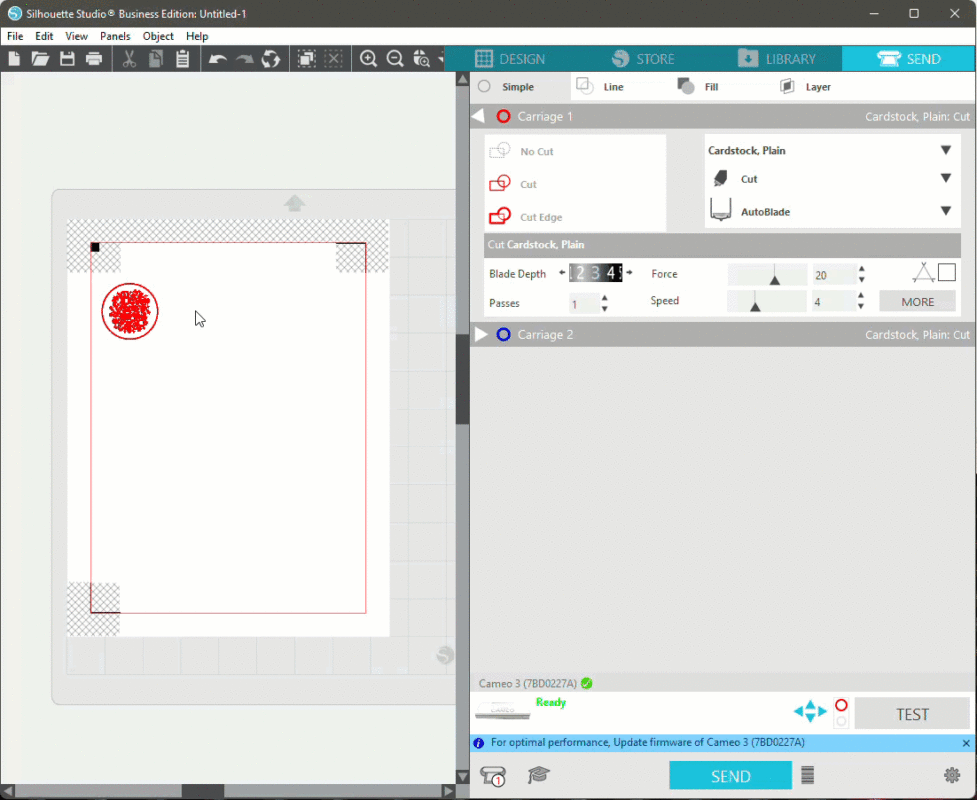
Step 7 – Check Cut Lines for Sticker Design and Circle
Click Send at the top right, and check to ensure only the circle is highlighted. If the design is also highlighted, select it and click the No Cut option on the right to remove the cut lines. This needs to be done as we only want to cut the circle and not the design.
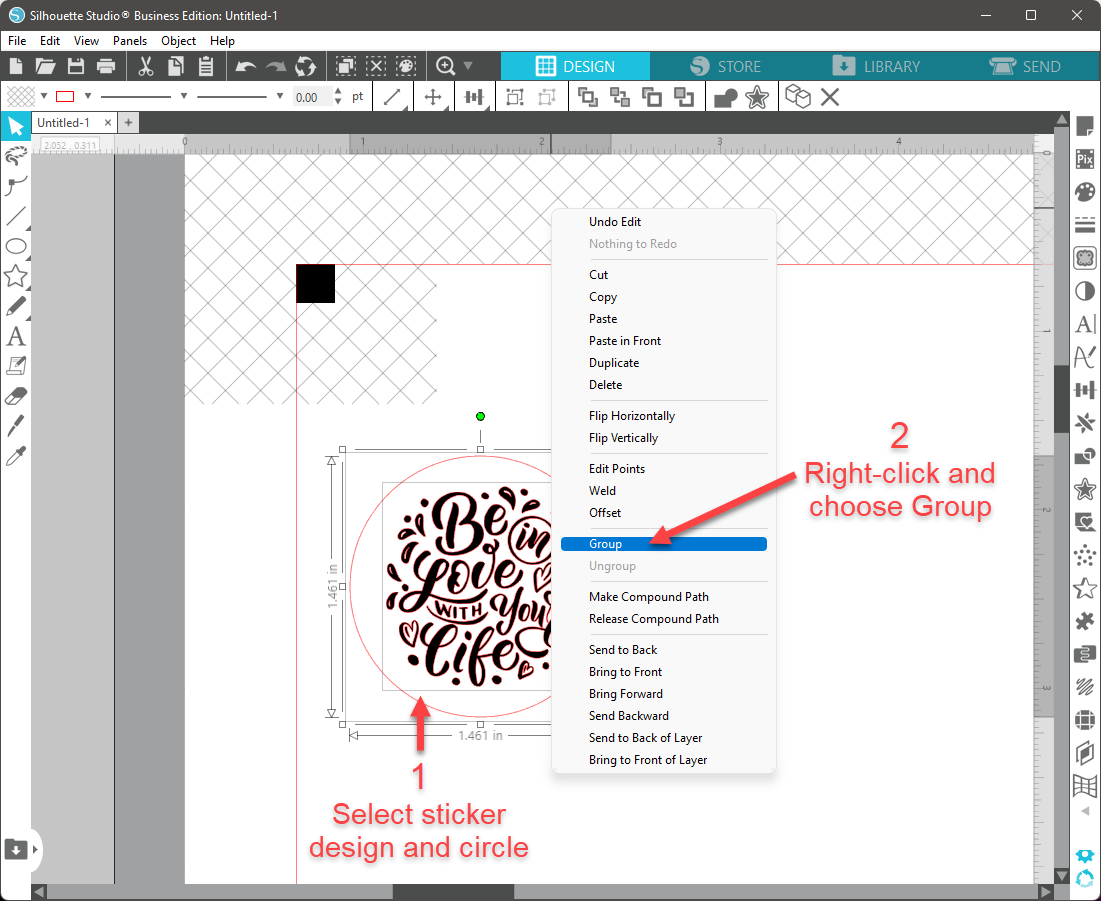
Step 8 – Group the Sticker Design and Circle
Click DESIGN at the top to go back to your workspace. Then select both the design and the circle, right-click and choose Group.
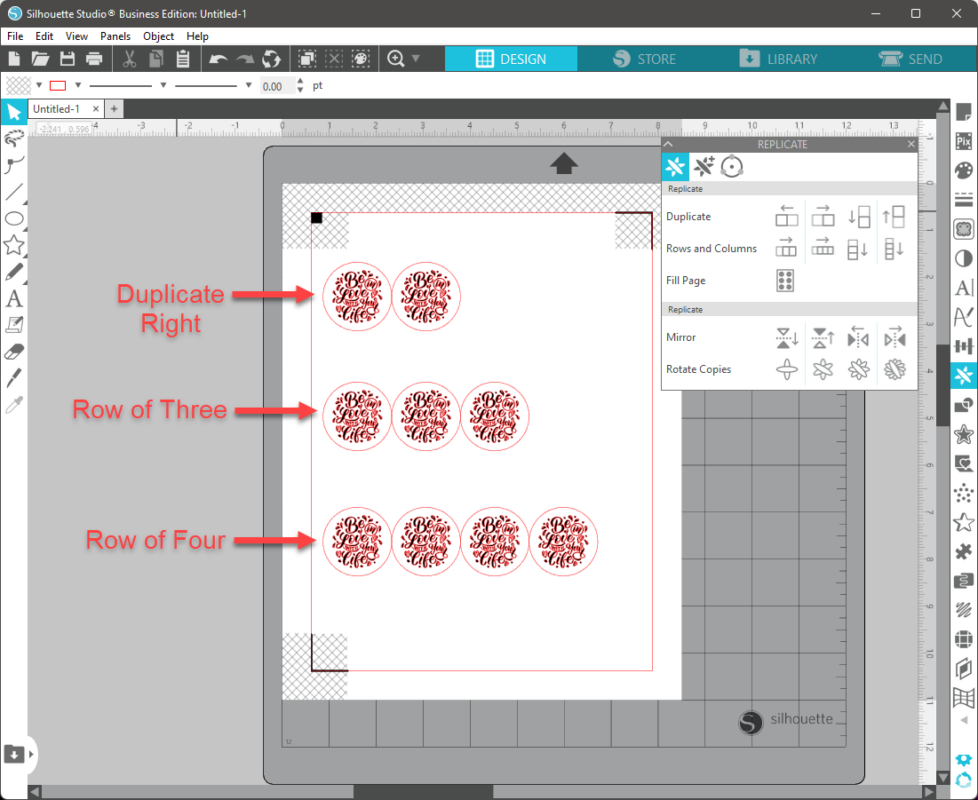
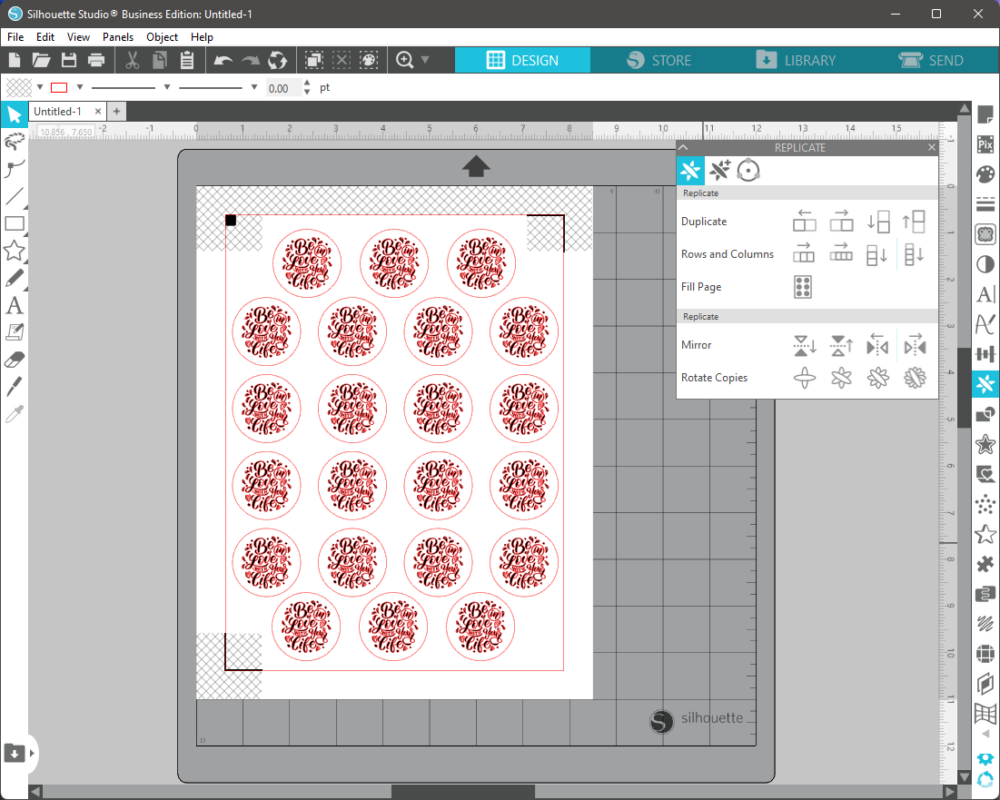
Step 9 – Fill the Entire Page With Stickers
Using the Fill Page Option
With the Fill Page option found under the Replicate section in the Replicate panel, we will fill our entire page with the stickers. Simply select your sticker design and click Fill Page.

Manually
You may prefer to manually fill the page as you can usually fit more on the page than what the Fill Page option does.
When filling the page, keep in mind that the stickers cannot go over the outer red line, and they cannot be on any of the registration mark areas on the top or bottom.
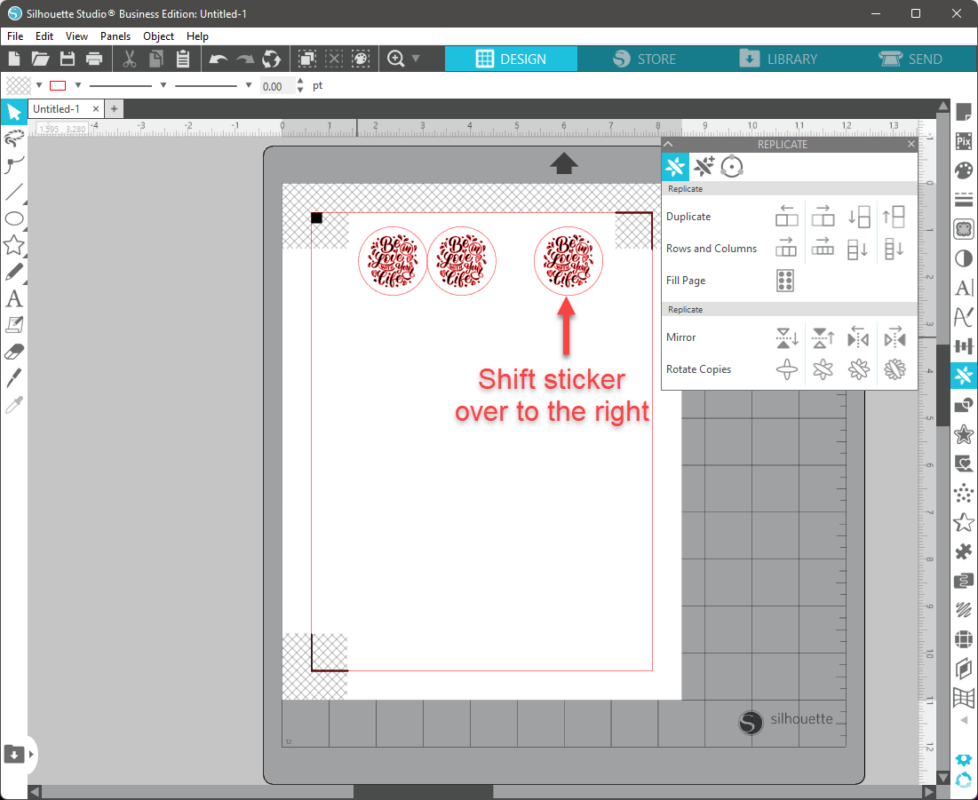
Select the sticker design and click Duplicate Right, Row of Three, and/or Row of Four in the Replicate panel until the stickers fill the width of the workspace. We’ve shown you how each option works in the following image.
Spread Out Stickers Evenly
Select the far right sticker design and click + drag it to the right while holding Shift to keep it in a straight line.
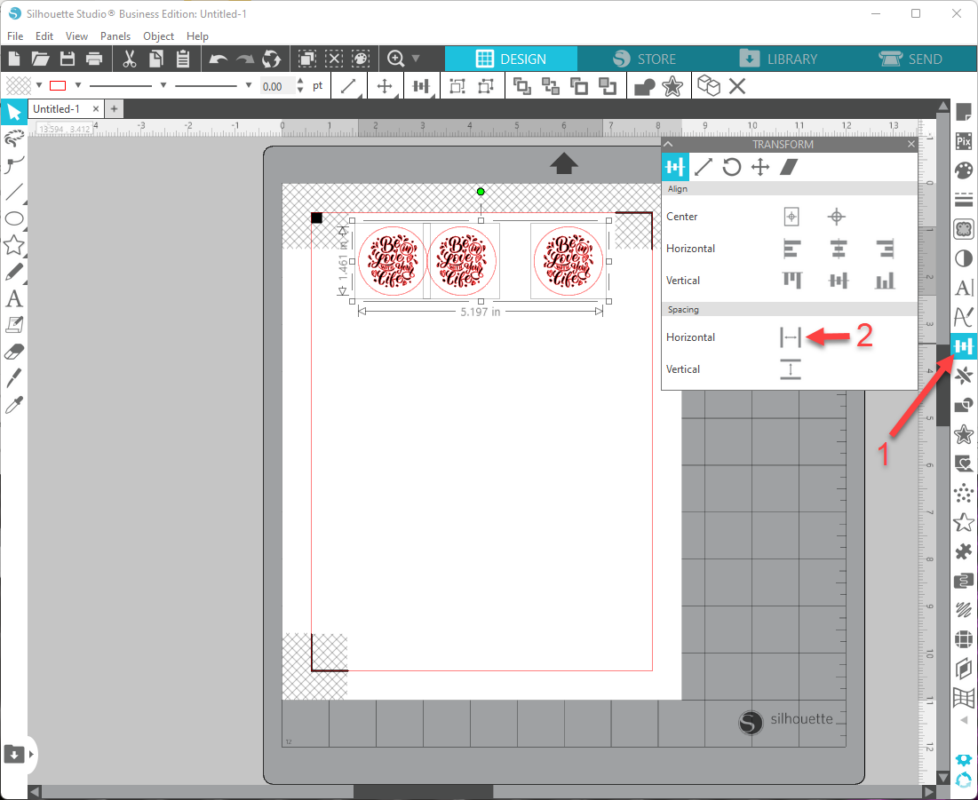
Now we’ll spread out the stickers evenly. Select all the stickers and open the Transform panel. Then click on Horizontal under the Spacing section of the Align tab.
Replicate the Line of Stickers Vertically
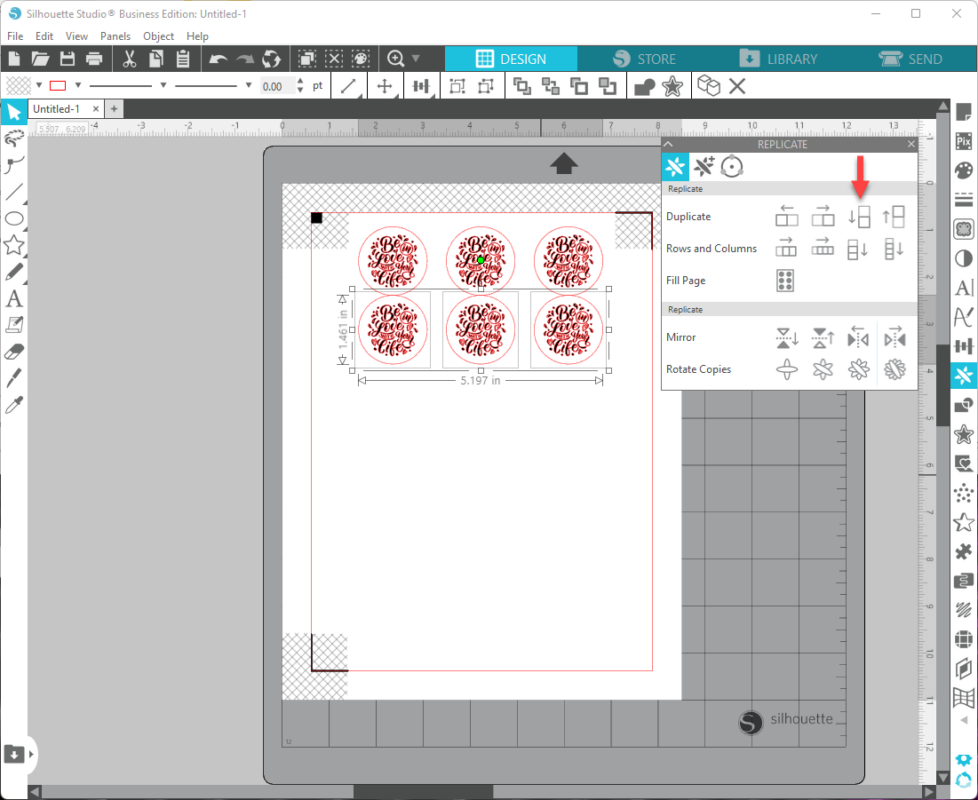
Select all the stickers and click Duplicate Below, Column of Three, or Column of Four, depending on how big your stickers are.
Adjust Second Row of Stickers
Because the middle portion of the workspace is wider, we can fit another sticker on the second row. Select a sticker and hold down Alt. Then click + drag to duplicate, and then evenly spread those stickers out.
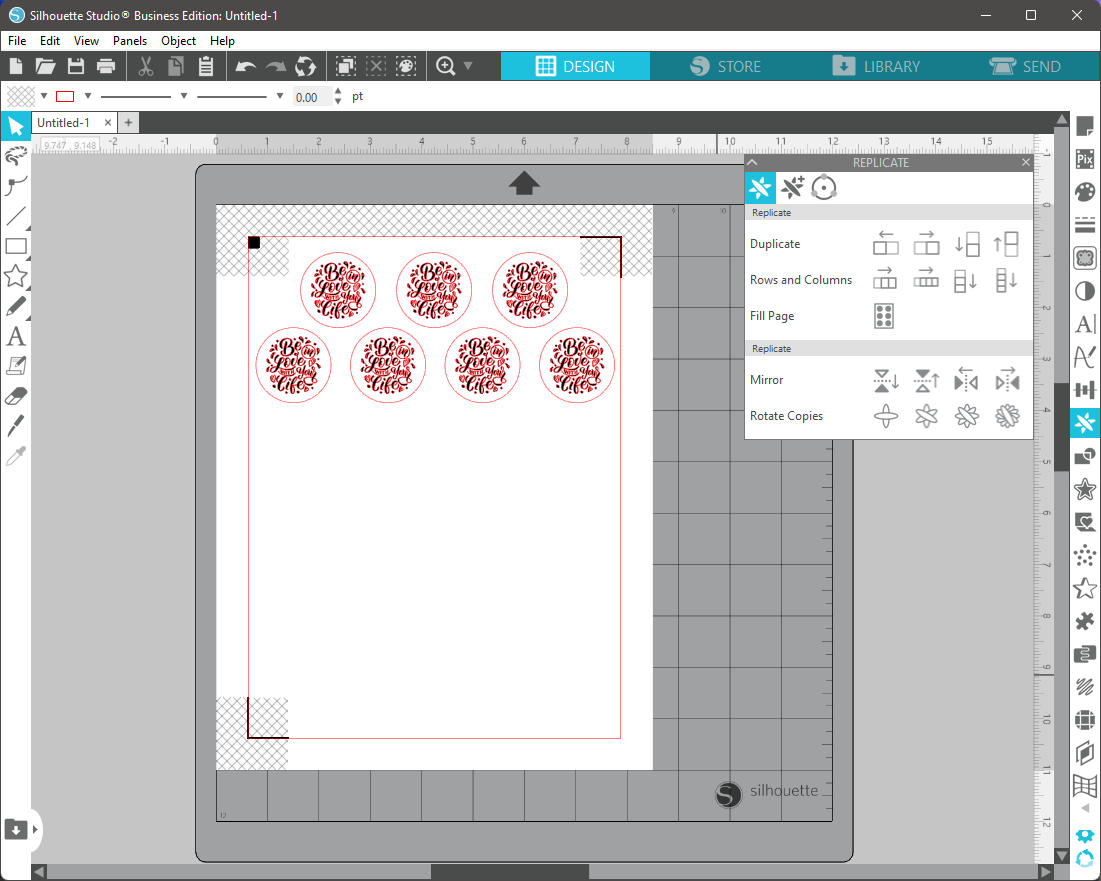
Continue Replicating and Spreading Out the Stickers
Continue replicating the sticker lines and spreading them out until the page is filled. Try not to put them too close to the red line and the registration marks.
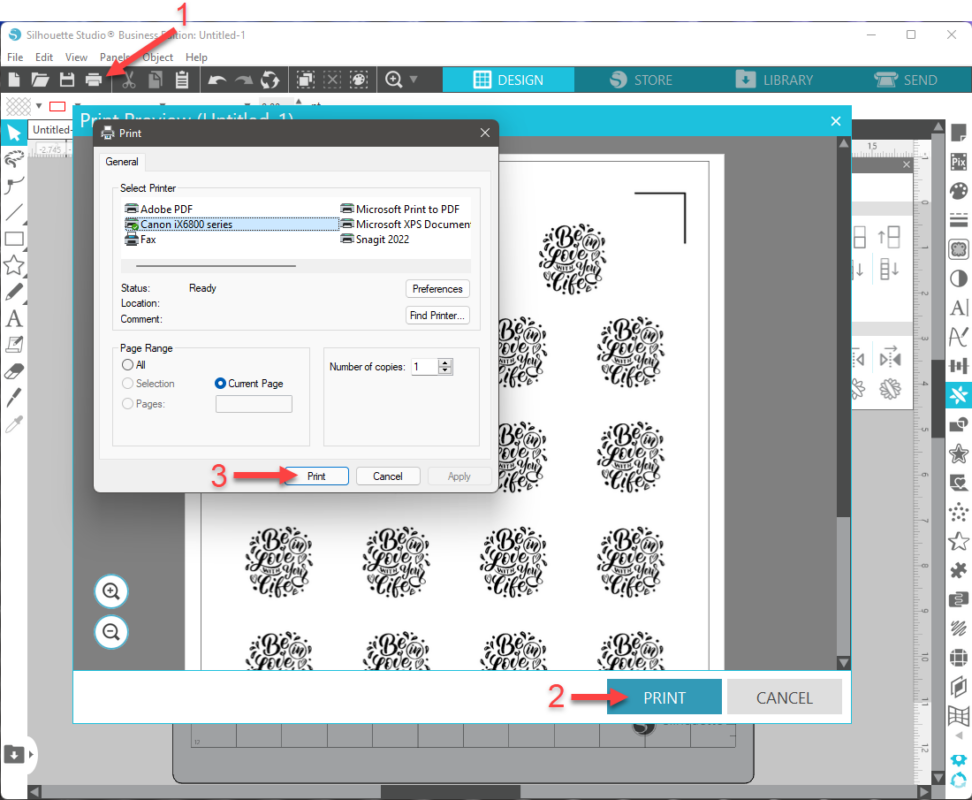
Step 10 – Print the Stickers
Go to File > Print or click the Print icon at the top. Make sure you don’t see the cut lines in the print preview. Click Print to open the Print dialog if the preview looks good. Then select your printer, edit Preferences, and click Apply. When ready, click Print in the Print dialog.
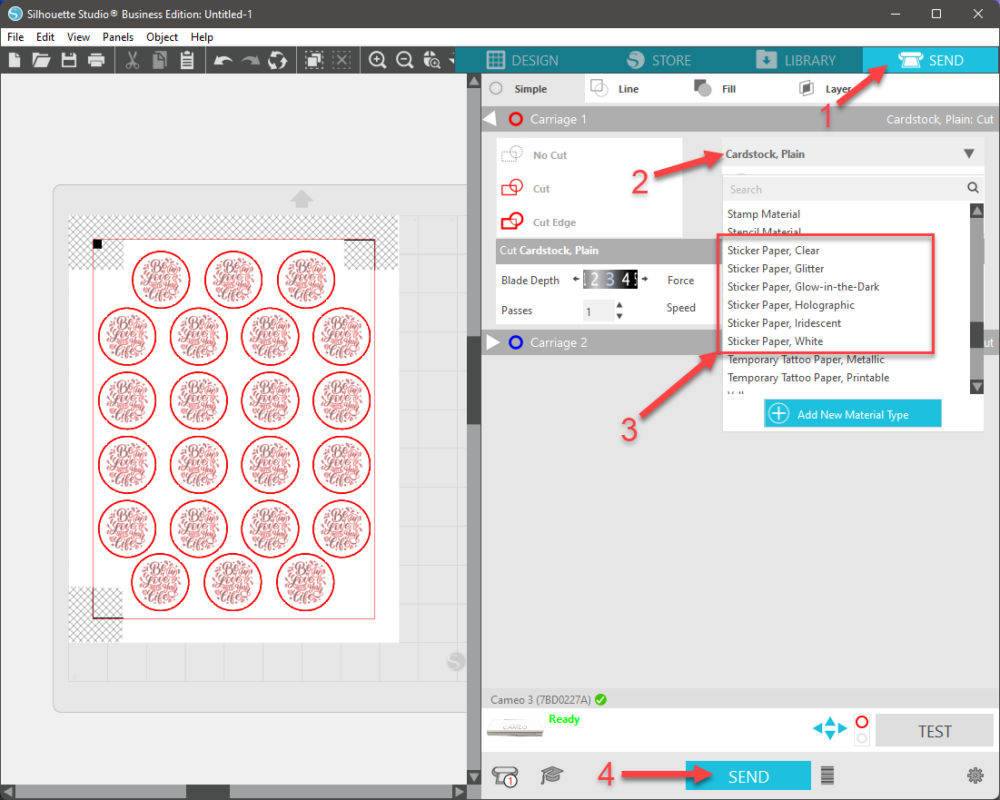
Step 11 – Cut the Stickers Out
Once your sticker sheet is printed, place it on your cutting mat and load it into the machine. Then click SEND at the top. Set your media to the type of sticker paper you’re using and change any cut settings if needed. Press SEND at the bottom.
Note: when using registration marks, ensure you are in a well lit area so your machine can clearly see the registration marks.
That’s all there is to creating sticker sheets in Silhouette Studio. It’s a great way to make unique stickers. We used a single sticker design for the entire sheet, but you could use all different sticker designs for a fun-filled sticker sheet!