How To
How to Curve Text in Cricut Design Space Mobile App

Jul
In this tutorial, we’ll delve into the process of curving text in Cricut Design Space App. Whether you’re using the app on your mobile device or tablet, you can now easily create curved text for your projects.
With our step-by-step instructions, you’ll learn how to add a stylish and personalized touch to your designs by curving the text. For those using Cricut Design Space on their computer, we also have a separate guide dedicated to curving text on the desktop version.
Let’s get started and unlock the creative possibilities of curving text in Cricut Design Space App. Enhance your designs with beautiful curved text for stunning results in your crafting projects!
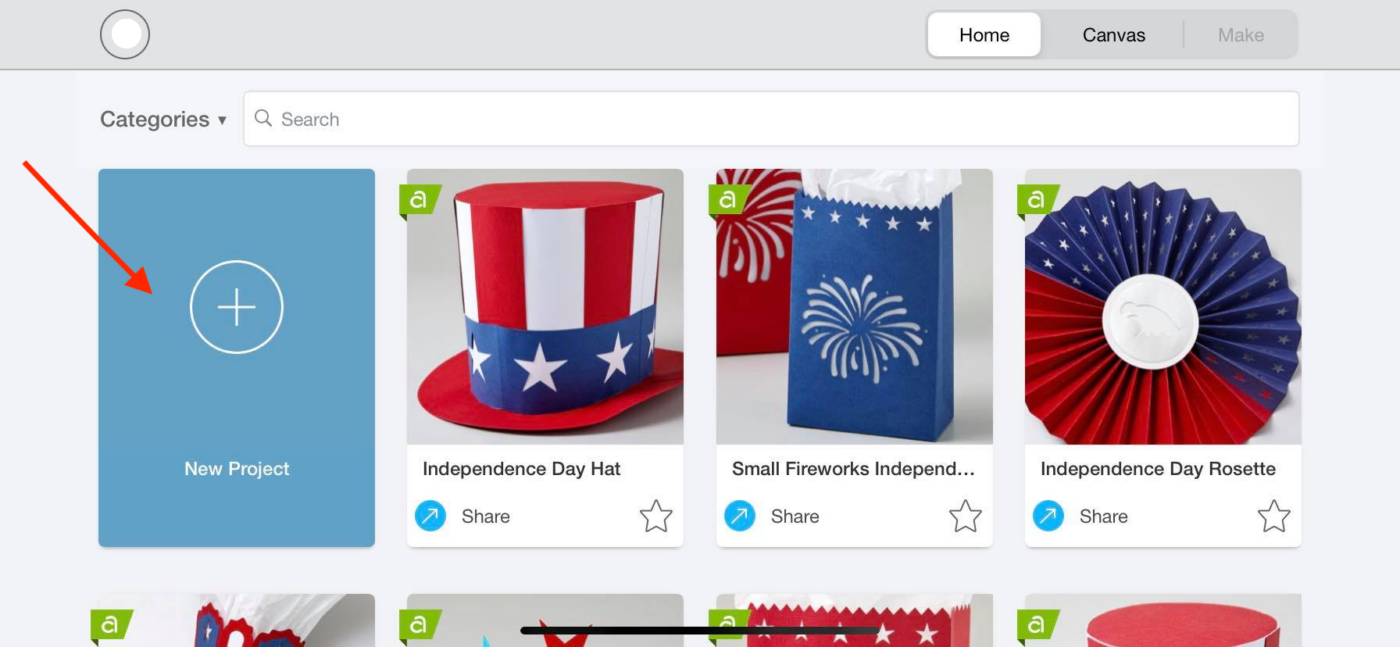
Step 1 – Create a New Project
Once you have logged in, create a new project in Cricut Design Space by simply clicking on the blue rectangle box that is labeled New Project.
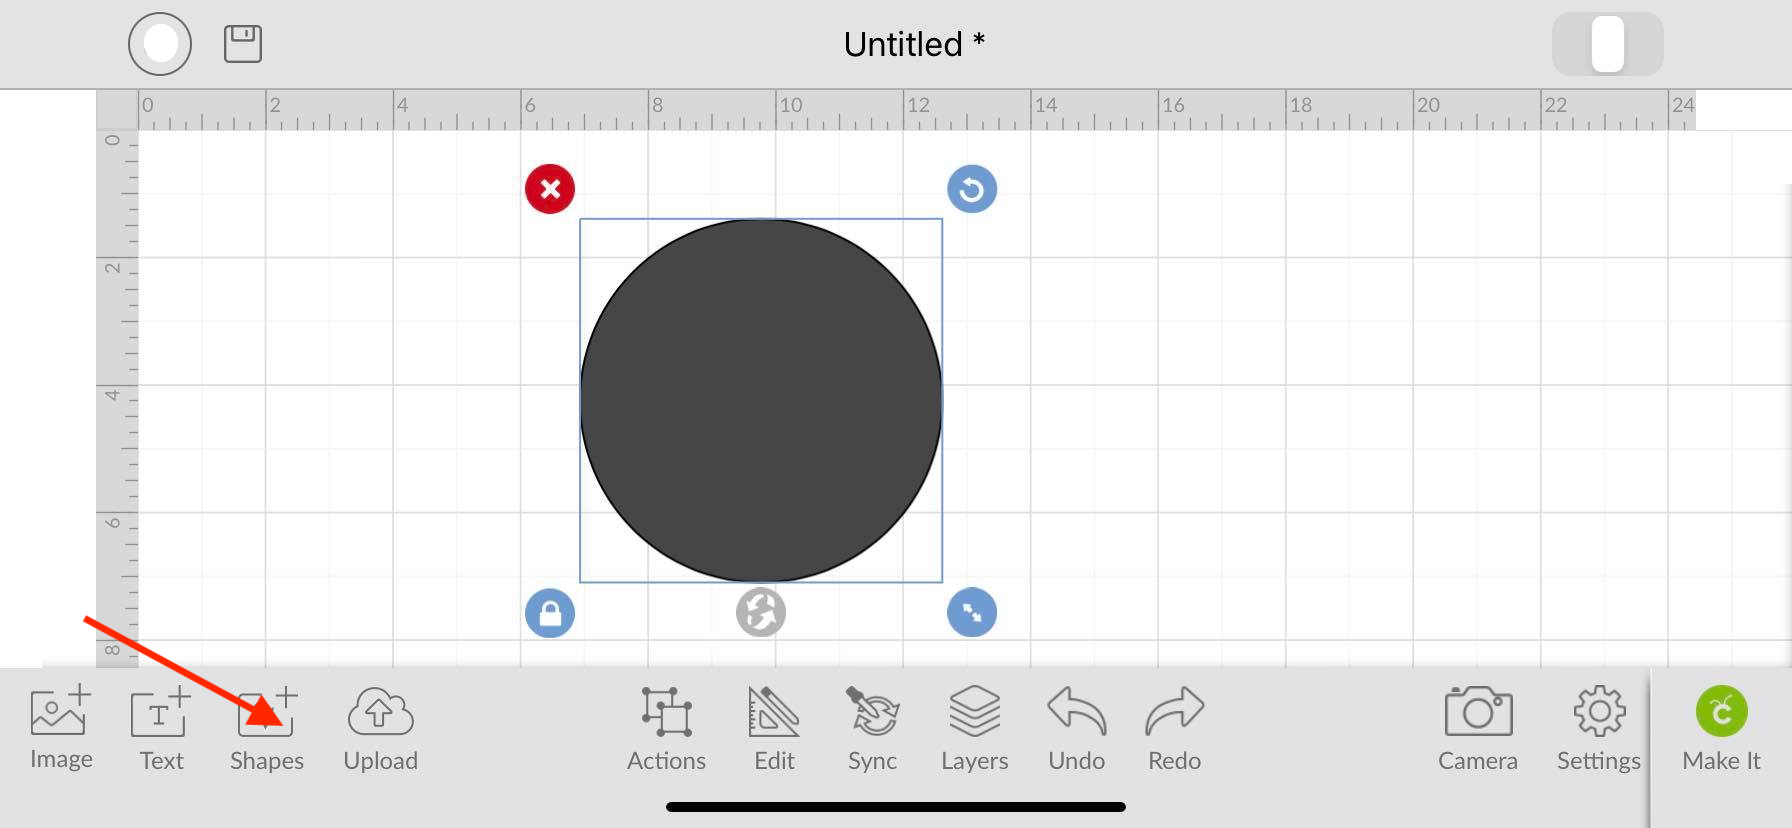
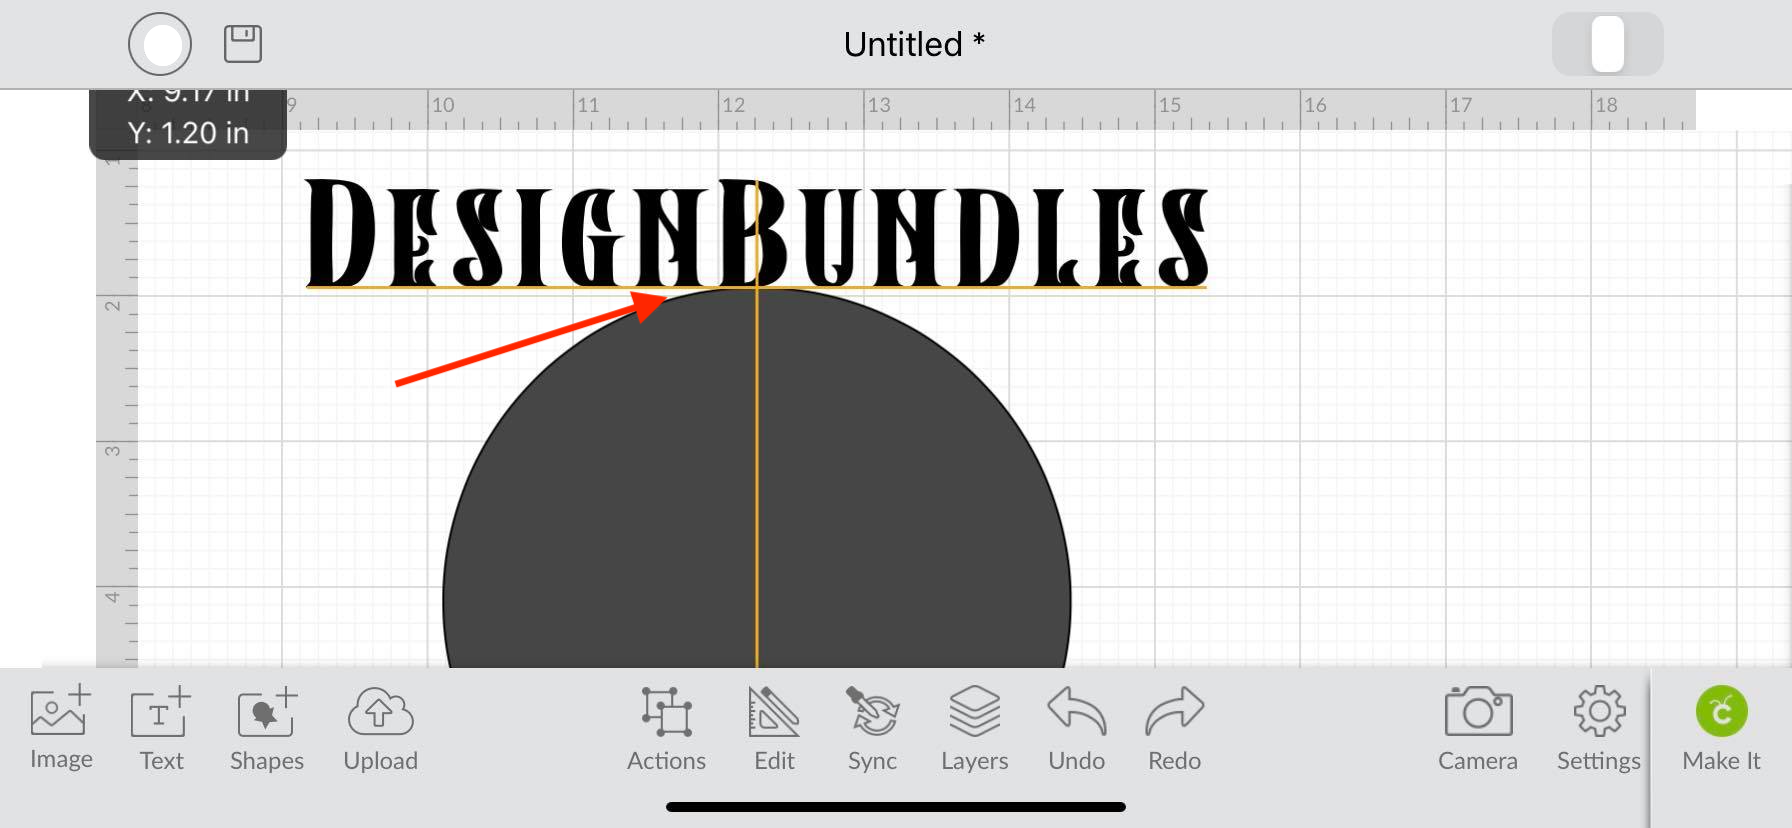
Step 2 – Create a Circle
Once on the canvas page locate your Shapes icon which is on the bottom left of your screen. Insert a circle to your canvas and resize to your liking. This circle will act as a guide for your text. We have amore in depth guide on how to make shapes in Cricut if needed.
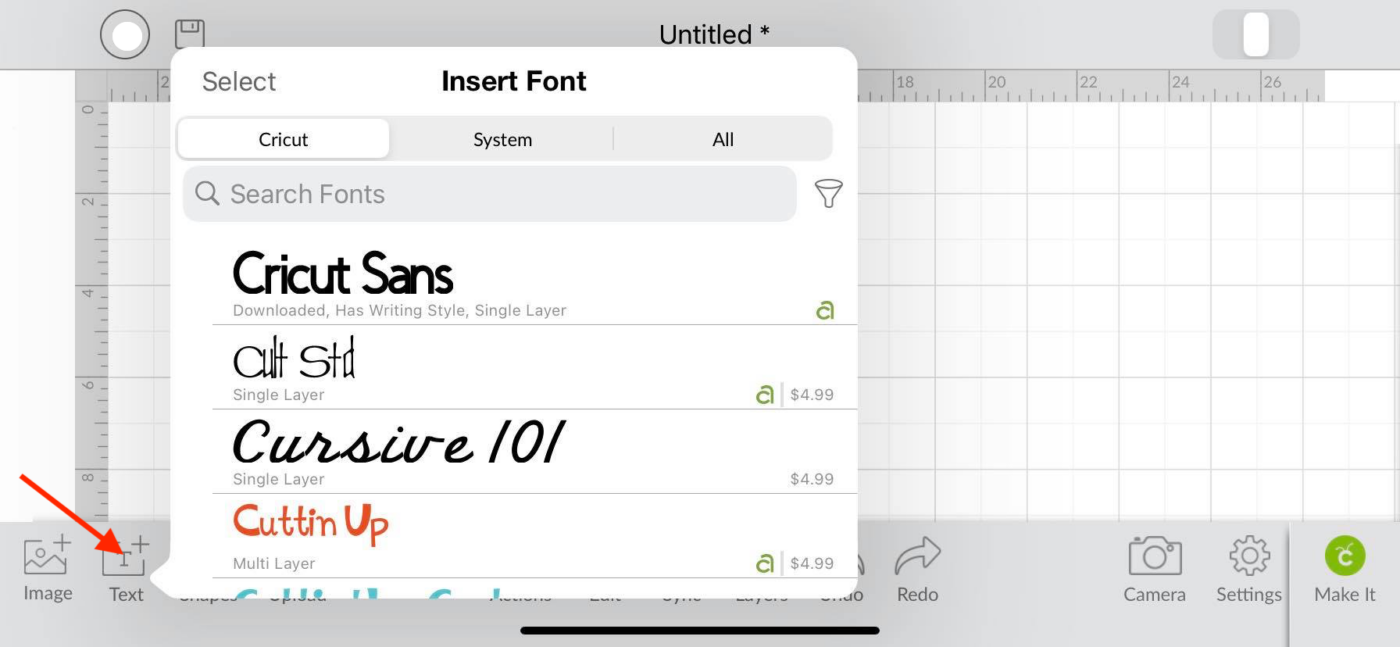
Step 3 – Type out Your Text
Click on the big “T” at the bottom of your screen to type out your text. Today I’ll be searching and using a vintage serif font called Black Rainbow by Vunira.
Once you typed out your text, place the word right above your circle.
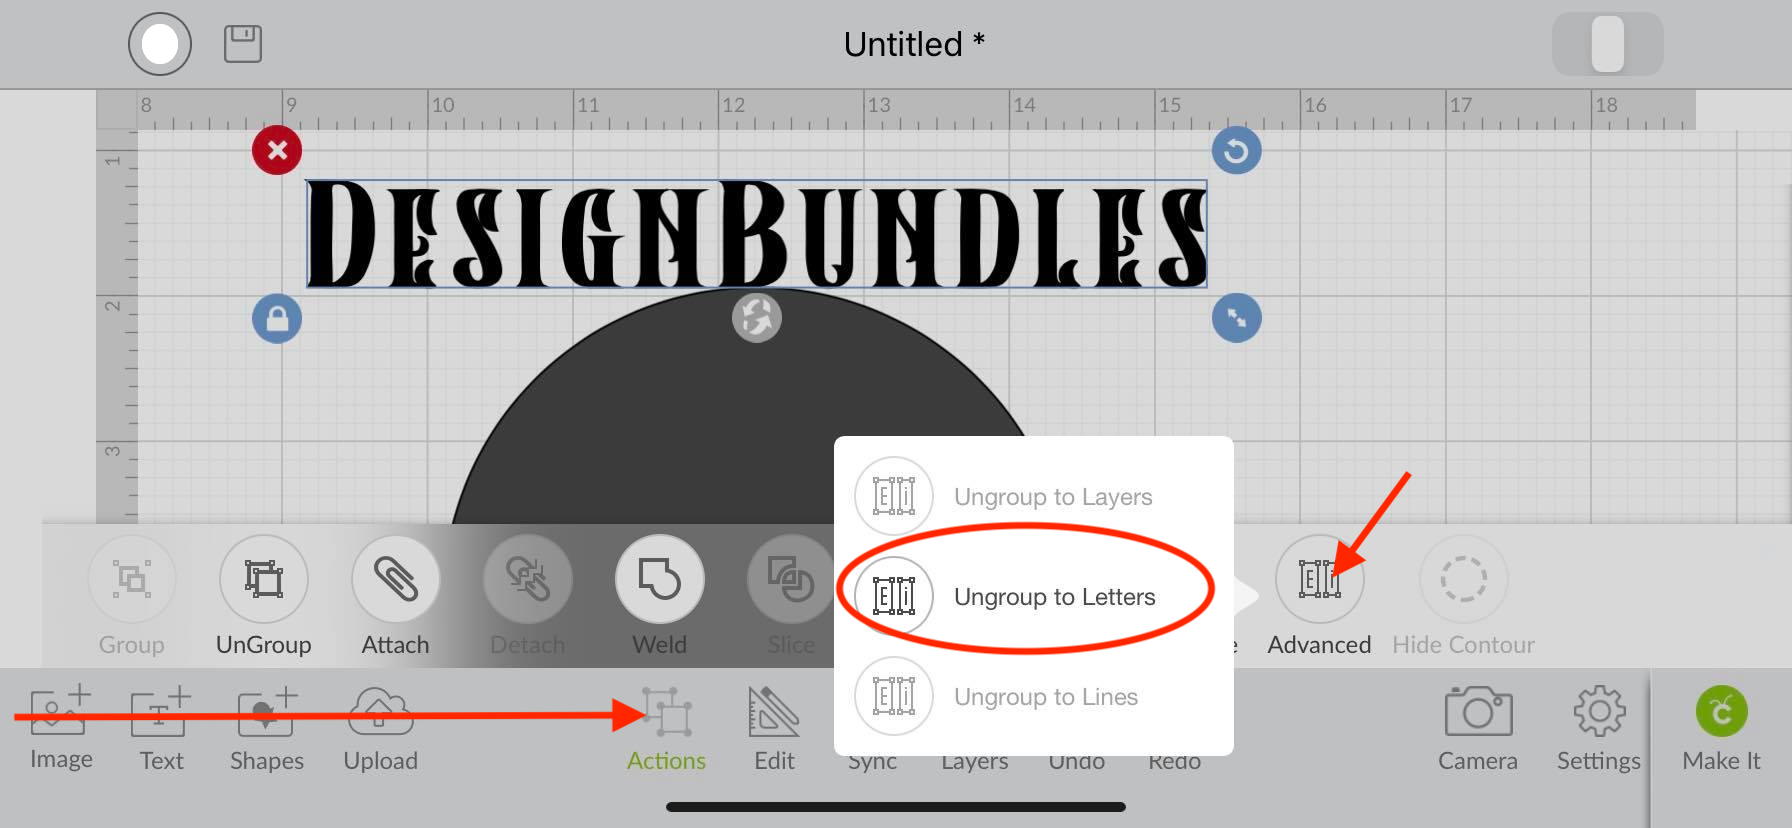
Step 4 – Ungroup Letters
Next you will have to ungroup your letters. You can do this by clicking on the Action icon. Once you do this another toolbar will pop up and you can now click on Advance and the Ungroup To Letters. This will help you manually move each letter to create your curve.
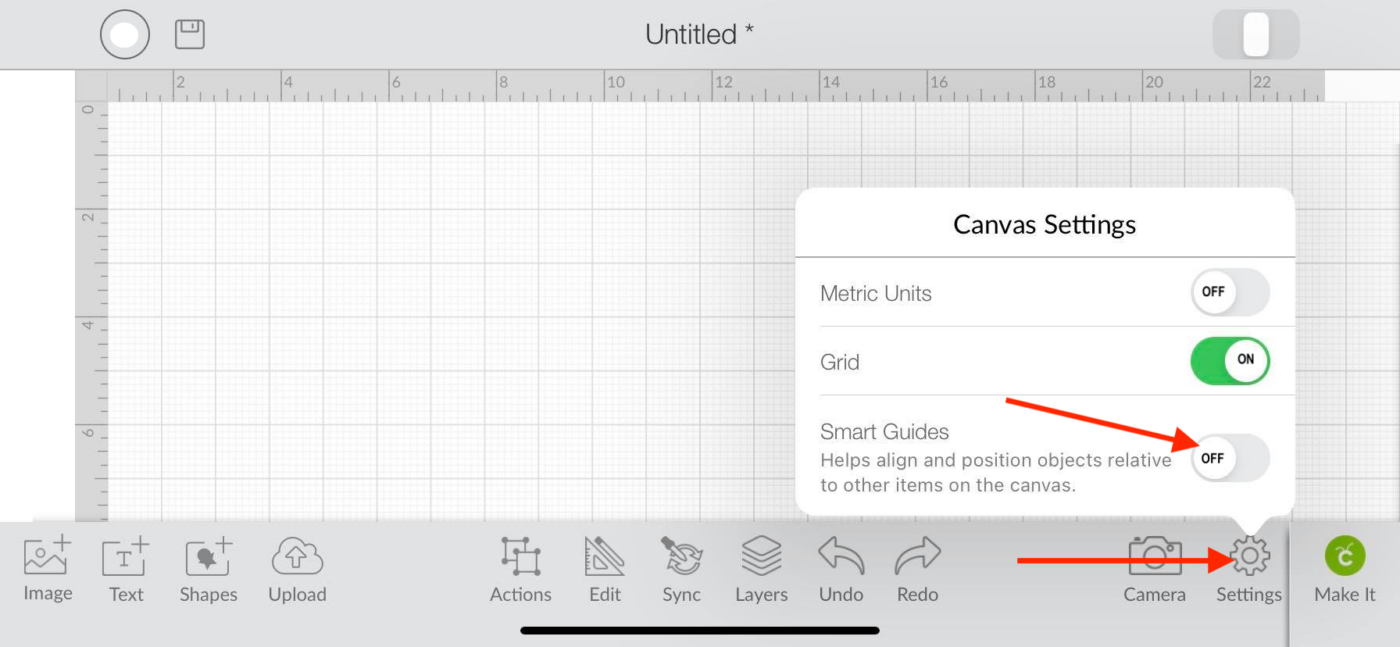
Step 5 – Turn Off Smart Guides
Before you start moving your letters around make sure to turn off your Smart Guides. Smart guides will usually help you easily align and position objects that are close together. For today though you want as much control as you can have to freely move each letter. To turn off smart guides, click on Settings on the right-hand side of your screen. A window will then pop up to switch off Smart Guides.
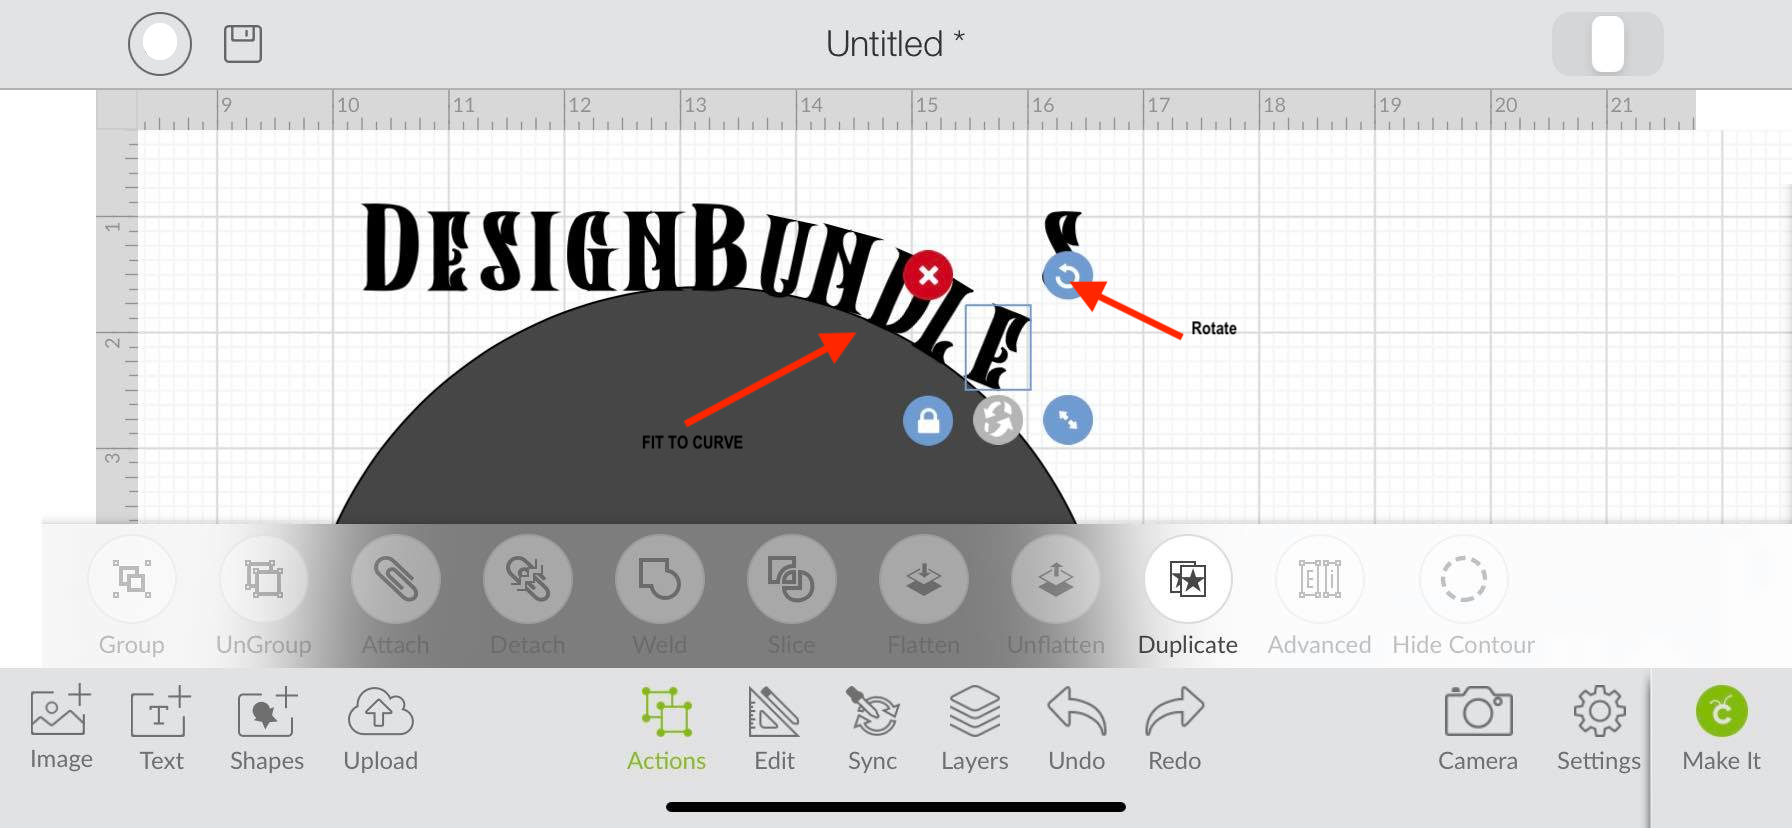
Step 6 – Manually move your letters
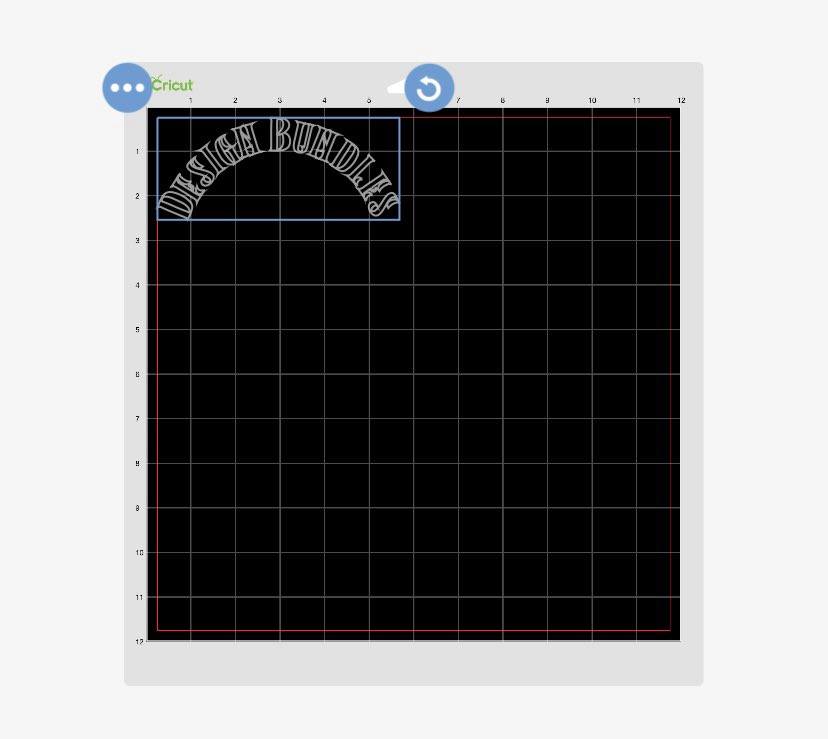
Manually move your letters around to fit to the curve of the circle. You can easily rotate the letters if necessary by selecting the letter and using the rotate button. This is usually on the top right side of your selected item. Continue to rotate and move each letter until it fits your shape. Once you are finished, you can select your circle and delete it. We no longer need it as a guide.
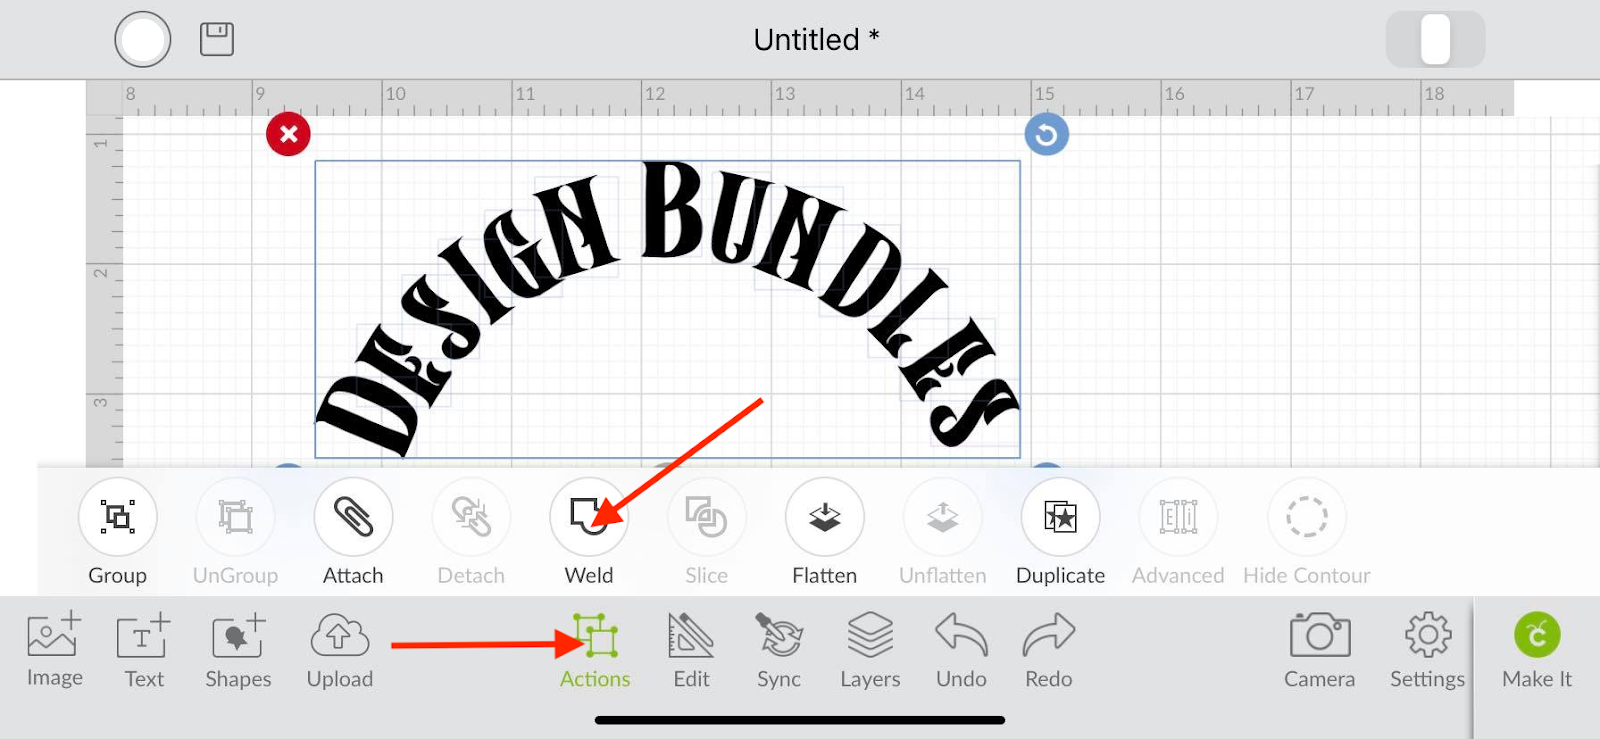
Step 7 – Select and Weld Letters
Drag your fingers over your text to select it. Once selected, click on the Action icon. A toolbar will pop up and you can now weld your items together by clicking the weld button.
You have successfully created a curved text in Cricut Design Space App.