How To
How to Cut Projects Larger Than Your Cutting Mat in Cricut Design Space
Jul
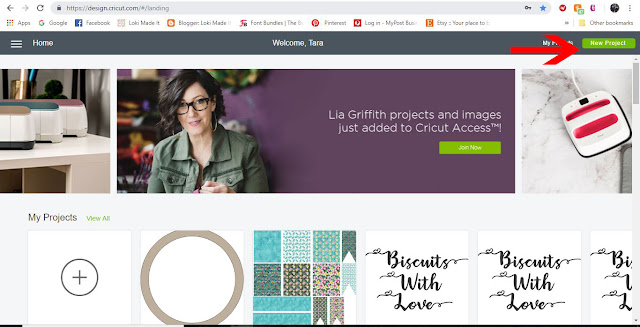
1- Log into Cricut Design Space. Click on a new project.
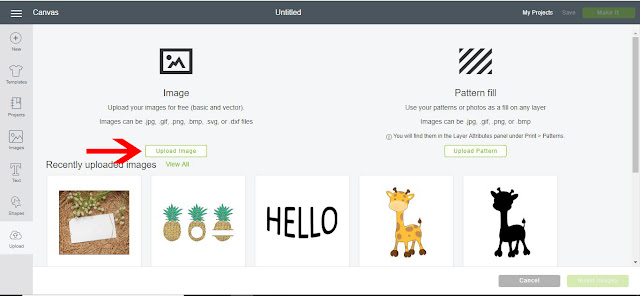
2- Go to the upload icon.

3- Click on upload image.
4- Click on browse.
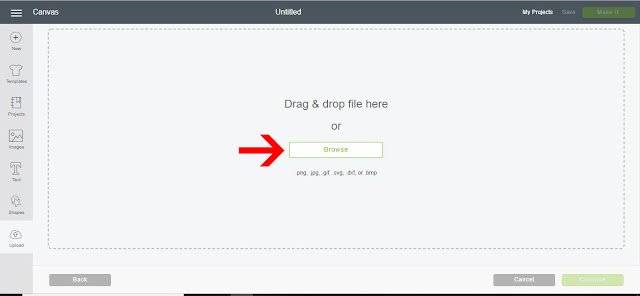
5- Select your design. it will appear in the left window.
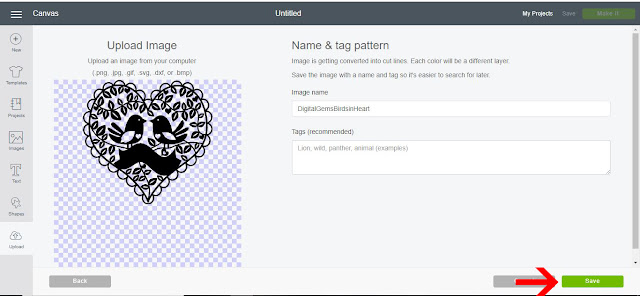
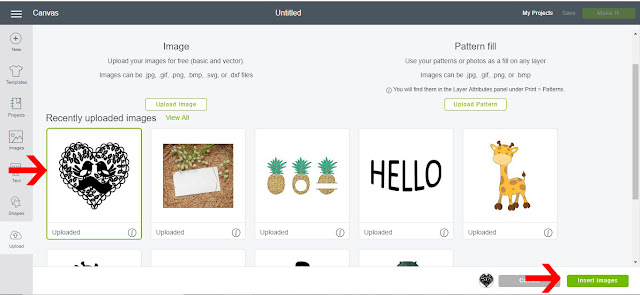
6- Your design will now appear in the recently uploaded image section. Select it. Click insert images.
7- Your design will appear in the design space. Resize to the correct size you need.
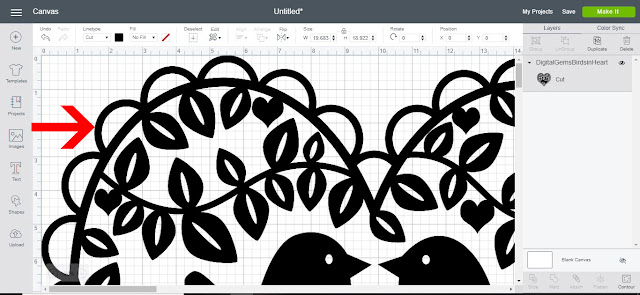
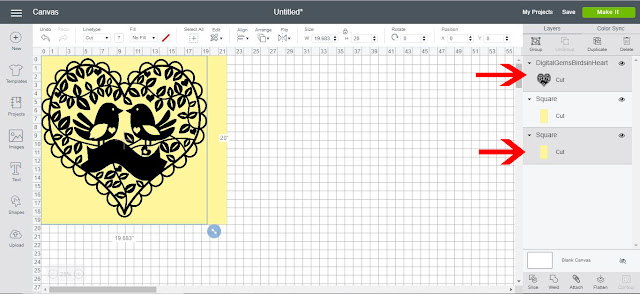
8- Make sure your design is in the top left. You can adjust that in the X and Y position on your top toolbar.
We now need the rectangles to separate your design so we can cut a large image. Go to the shape tool.
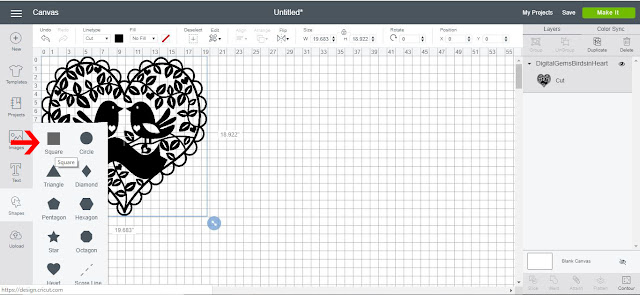
9- Select your shape and resize to a rectangle.
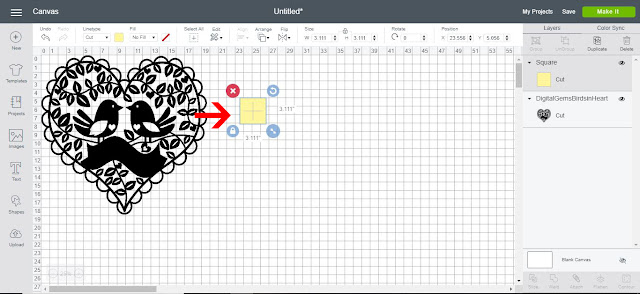
10- Cover 1/2 the design with the rectangle. Make sure it is positioned in the top left also.
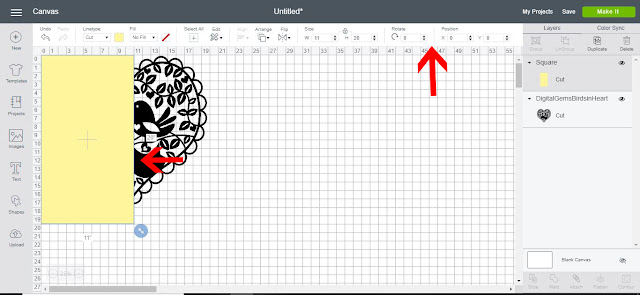
11- Duplicate the rectangle. Place the rectangle over the other 1/2 of the design. you can line this rectangle as well using the X and Y position tool.
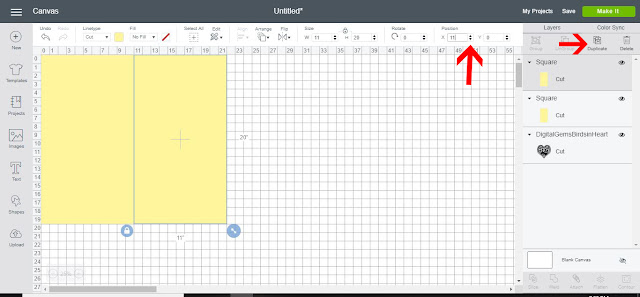
12- With both the rectangles selected right click and send to the back.
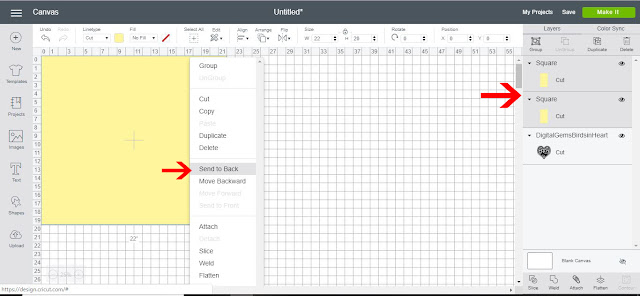
13- In the layers tab select the design and one of the rectangles. Click on the slice tool at the bottom of the layers tab.
14- Separate the sliced parts. You will now have two halves of your design. you can delete all the excess sliced parts.
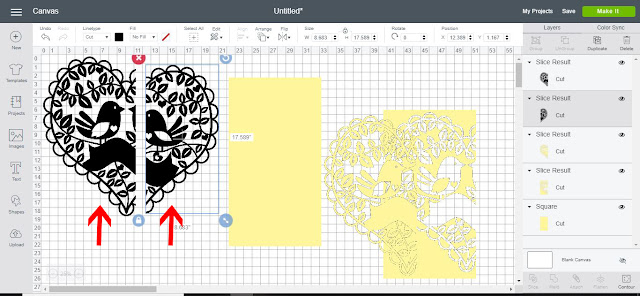
15-Click on Make it. The design will now be in 2 parts
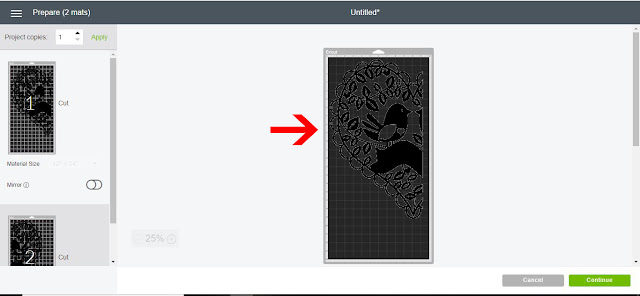
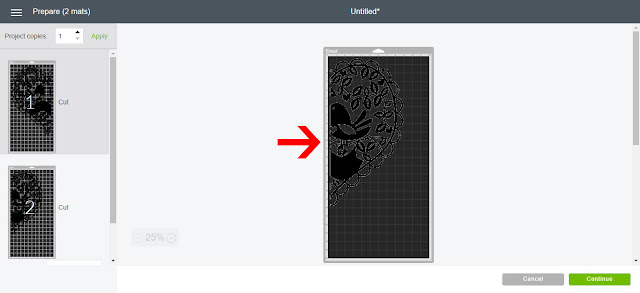
16-The second 1/2 of the design will be able to cut next. And you can adhere the 2 halves together.
This technique can be repeated many times with 4 or more squares or rectangles to cut even bigger designs.