How To
How to foil leather with the brother scan and cut and the foil quill
02
Aug
Aug
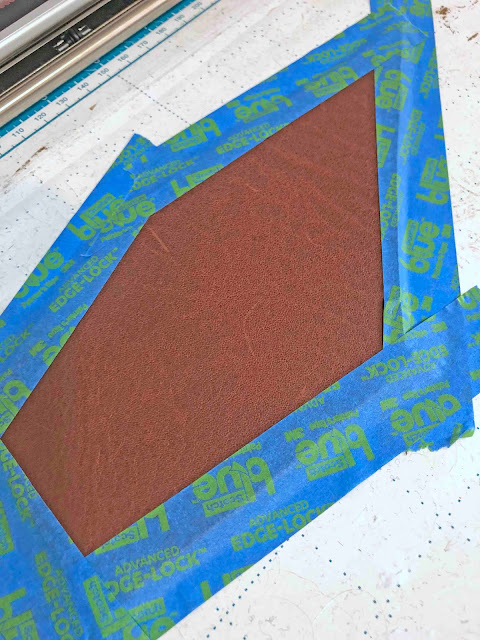
1- Place your leather onto your mat. Make sure you secure it down well onto the mat with painters tape or washi. Your leather needs to be 2.5mm or thinner.
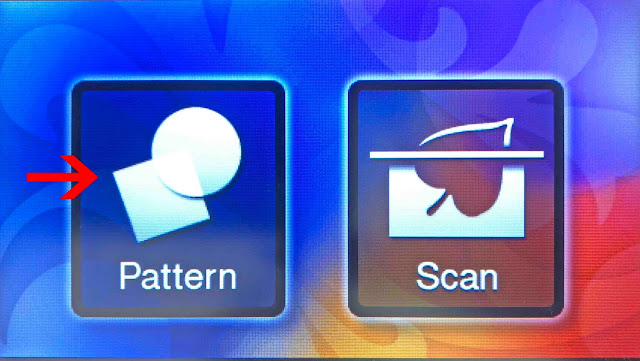
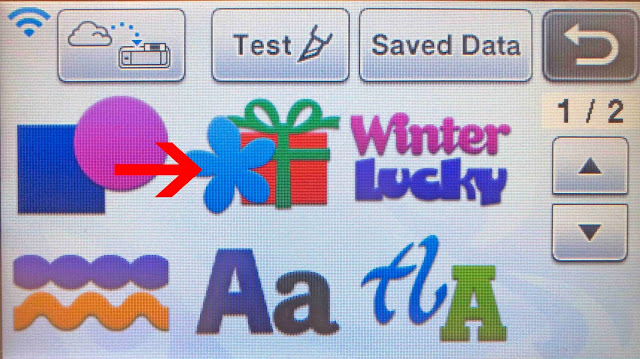
2- On your machine click the pattern icon on the screen.
3- Select your design.
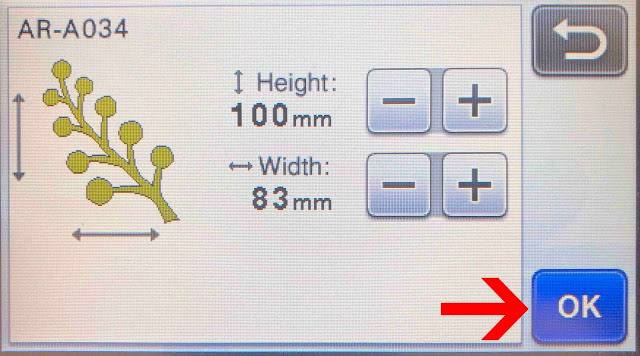
4- Adjust the size of your design. Click OK.
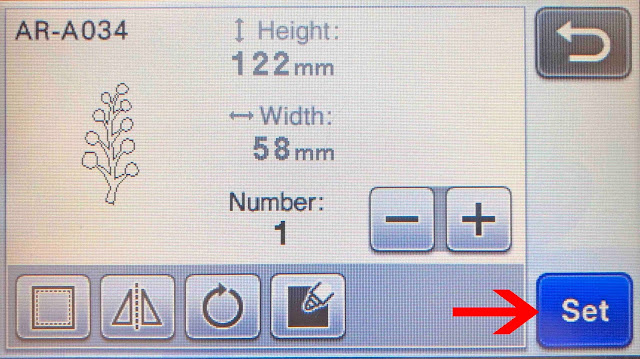
5- Select the number of copies you want to make. On this screen you can also add color fill to your design. Click set.
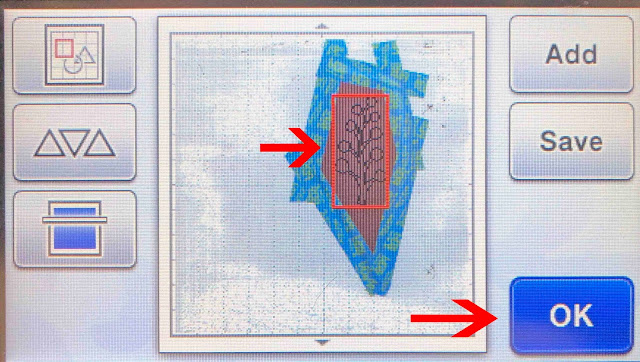
6- Next scan your leather into the mat. Click OK
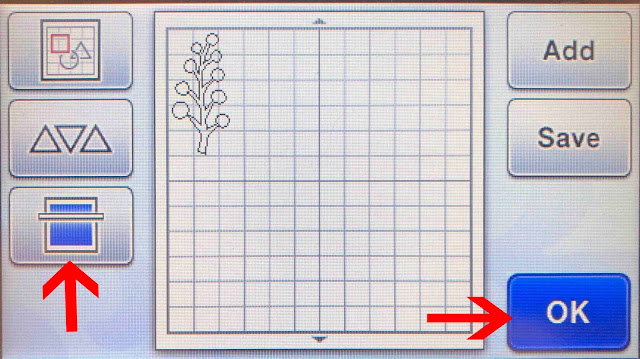
7- Move your design over the leather scanned into the screen. Click OK.
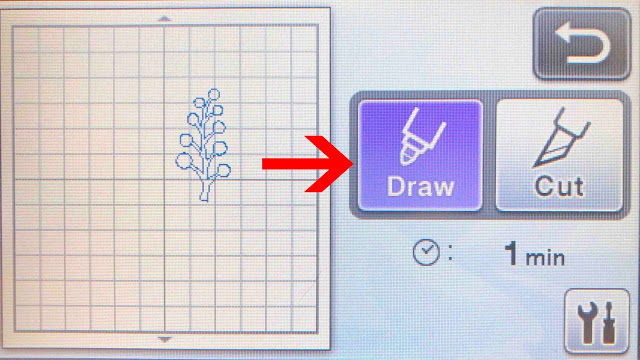
8- Click draw. When foiling leather I use the setting of speed 2 pressure 2. Click the start icon.
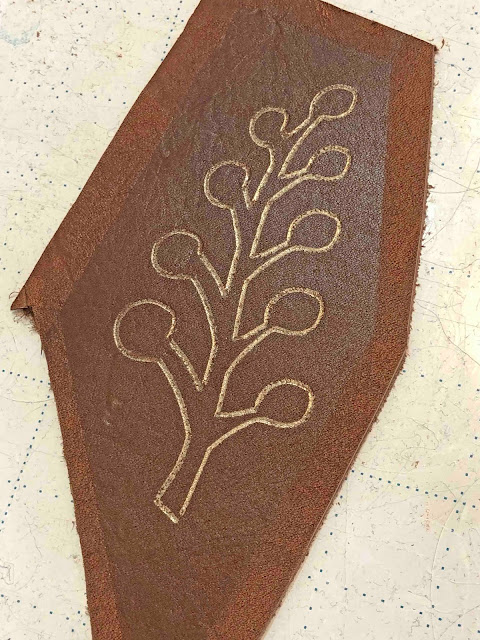
9- Your design will be foiled onto the leather.