How To
How to Change Cut Lines to Score Lines in Cricut Design Space

Jul
At present, SVG files uploaded to Cricut Design Space are automatically imported as cut files. While this may be frustrating for those who frequently create envelopes or cards with score lines, fear not! In this tutorial, we will show you a simple and effective method to convert those cut lines into score lines.
By following our step-by-step instructions, you’ll learn how to easily transform the imported cut lines into score lines, allowing you to create intricate and precise score marks for your projects. Say goodbye to the frustration and unlock the full potential of your designs with this helpful tutorial.
Let’s dive in and master the art of converting cut lines to score lines in Cricut Design Space. Get ready to elevate your crafting skills and achieve stunning results in your envelope and card creations!
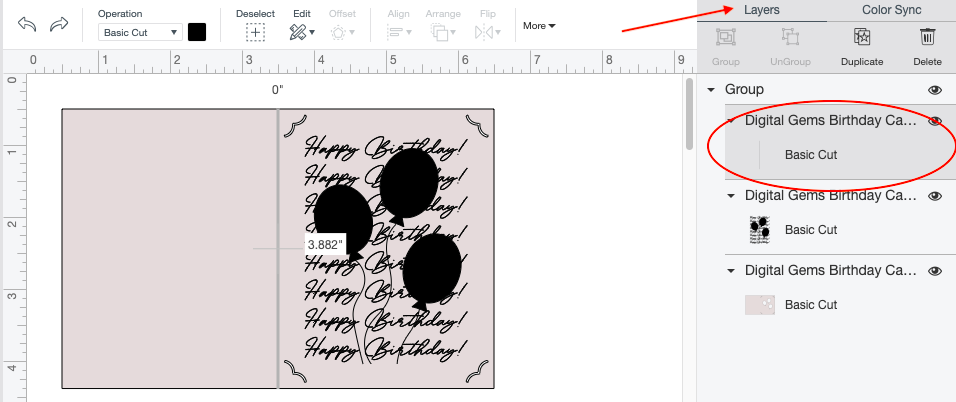
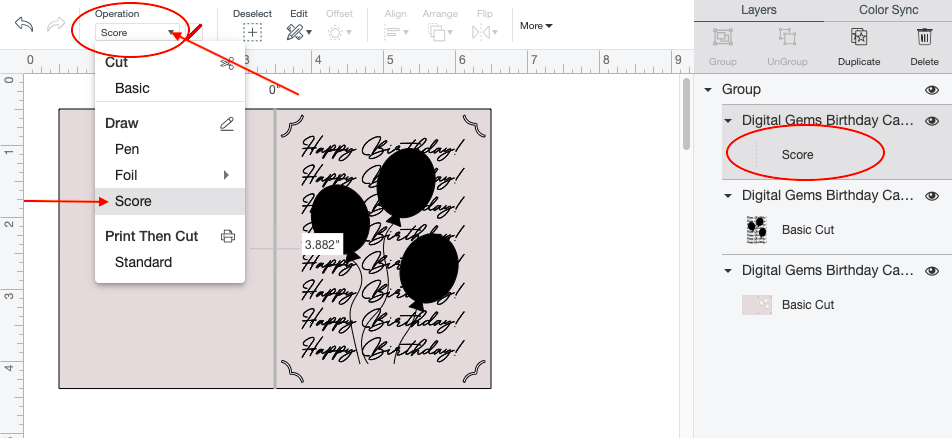
Step 1 – Select and Change Line Type
Start by selecting the item that needs to be changed to a score line. You can do this by clicking on the individual object under the Layers panel.
With the item selected, you can now click on the Operation tab on the top toolbar. A pop-up will soon appear that will allow you to change the line type for the selected object. Next, Scroll down and click on the Score button that is under the draw section. Doing this will change the cut line into a score line, which we wanted to achieve today.
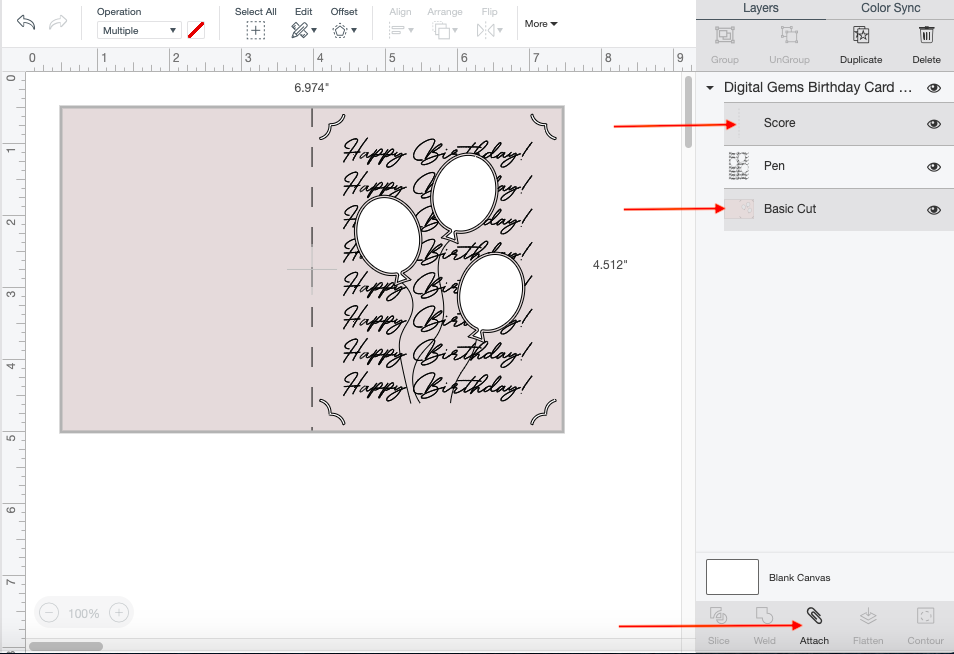
Step 2 – Attach Score line
Next, select the score line and card template under you layers panel. After selecting both items, click the Attach button on the lower right-hand corner of the canvas screen. The attach button will bring both selected layers together.
You have successfully changed cut line into a score line. You can now finish up the project by clicking the green Make it button on the upper-right hand corner.