How To
How to Create a Distressed Design in Cricut Design Space
Jul
Achieve a stunning worn-out look effortlessly with our simple steps for creating a distressed design in Cricut Design Space. Transform your graphics into vintage masterpieces by following this tutorial.
Step 1. Create a New Project
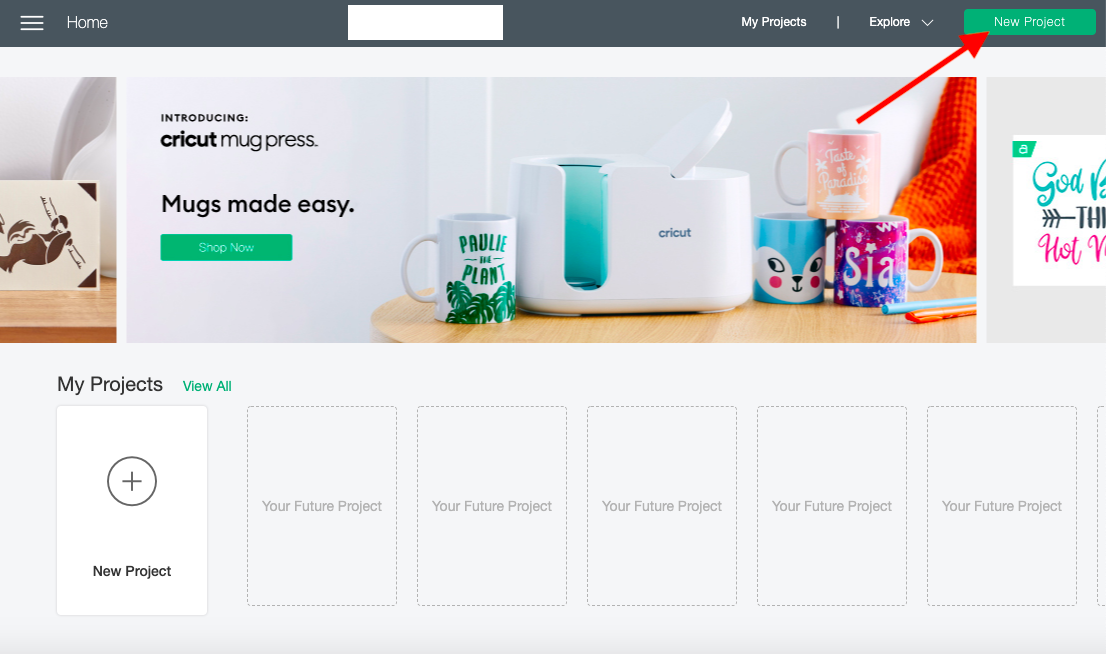
Once you are have logged in, create a new project by simply clicking on the green button that is labeled New Project on the top right-hand corner.
Step 2. Upload SVG Files
For this new project I’ll be uploading two amazing files from Design Bundles. To create the distress I’ll be using a Distressed SVG by ZenSVG. This file comes with 6 types of distress backgrounds in several file formats. I’ll also be using a funny SVG designby Vinyl Me Crazy.
We have a great guide on uploading SVGs if needed. Once you upload your design insert your artwork to the canvas page.
Step 3. Weld Layers
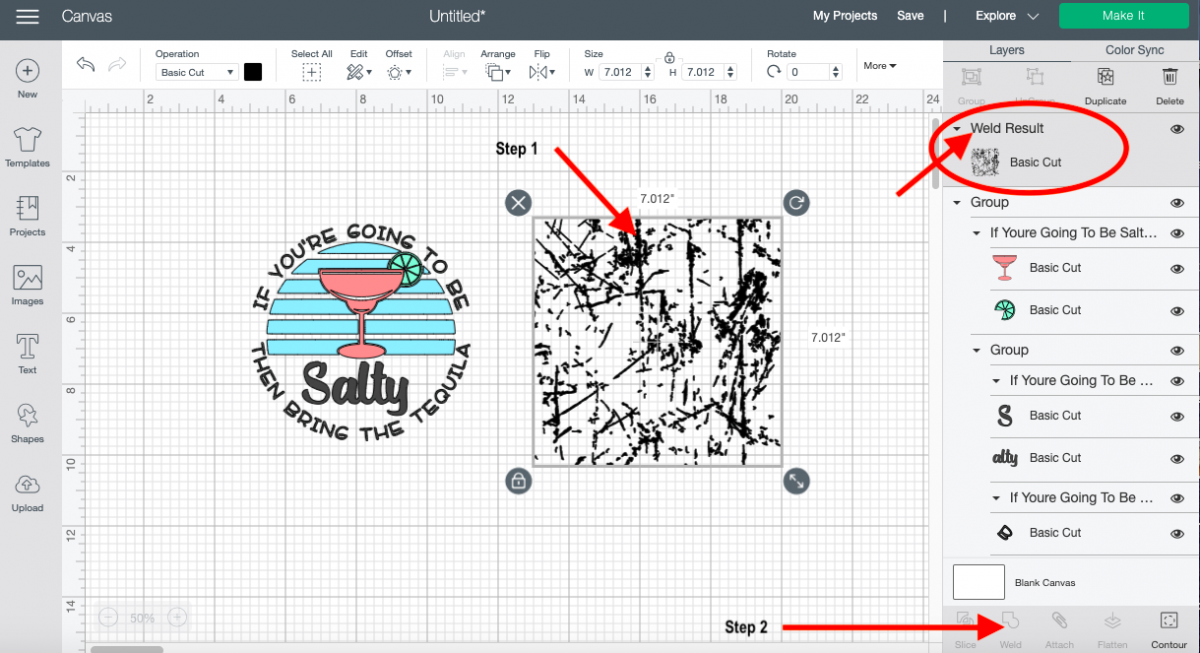
Before we can distress we have to prepare are layers to do so. Select the distress layer. You can do this by clicking and dragging over the design.
You can also use your layer panel on the right side of the screen by simply clicking on the layer that has your design.
If you have more then one layer that you need to select, hold down the Shift button on your computer and click on the layers at the same time. You will know they are selected when they are highlighted a darker grey.
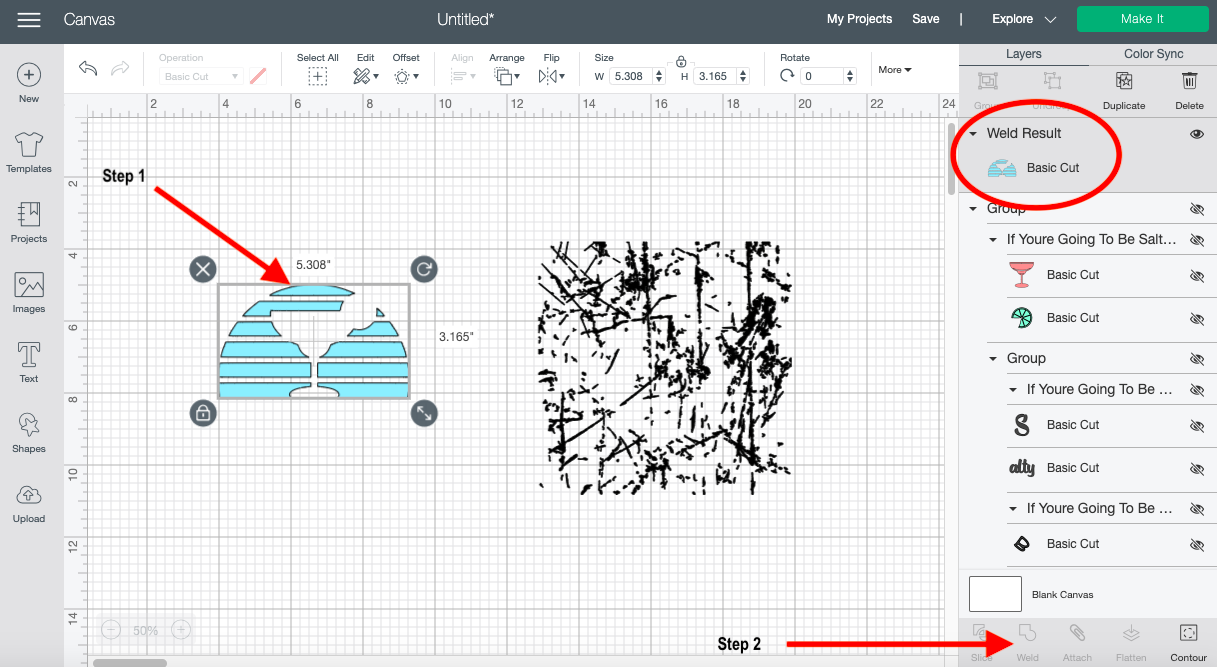
Once selected, weld the artwork you are working with by clicking on the Weld button in the lower right-hand corner. This might take a few seconds to weld depending on the size and details in the artwork.
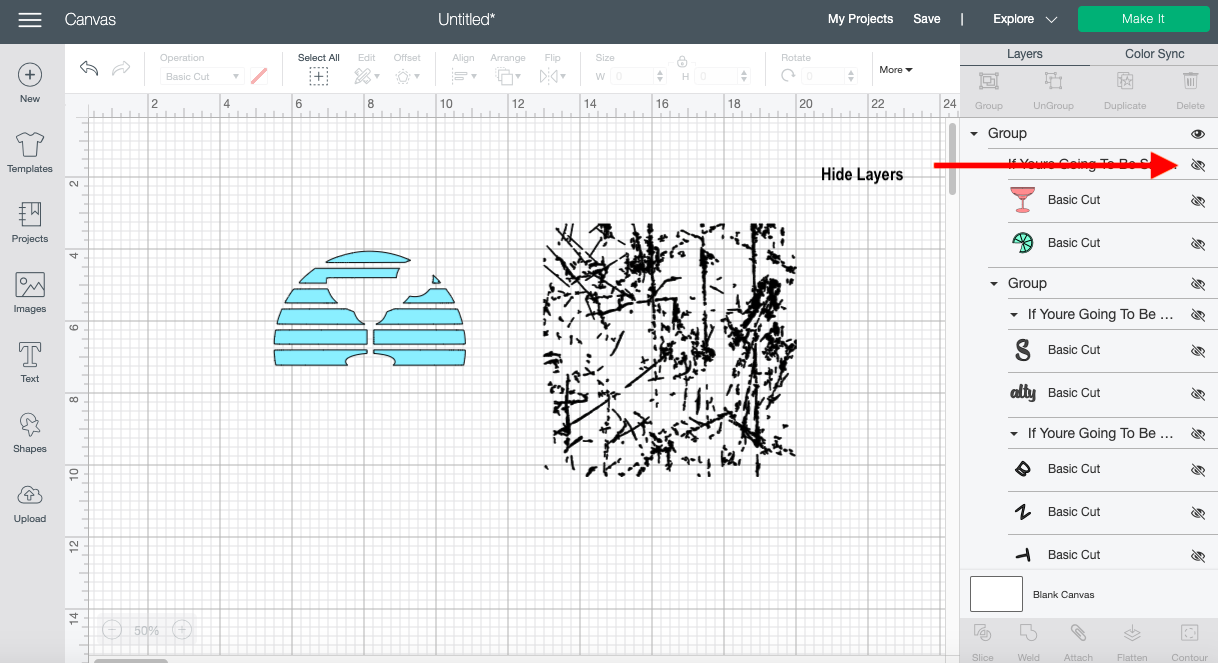
Move on to your second image. Today I’m working with a multi-color file and just want to distress a portion of it. To prepare a file like this, hide all the layers you are not working with by clicking the Eye.
The eye is located on the far right of each layer box under your Layer Panel. Once you click on it, a slash will go through the eye and the layer will be hidden. Continue to do this until you have the layer you want to distress.
Repeat step 1 and 2 for the layer you want to distress.
Step 4. Place Layers on Top of Each Other
Lay both files on top of each other. It does not matter which one is on the bottom or which one is on top, as the process will work either way. Select both files that you are working with, by clicking and dragging over both items on your Cricut canvas or by using your layer panel.
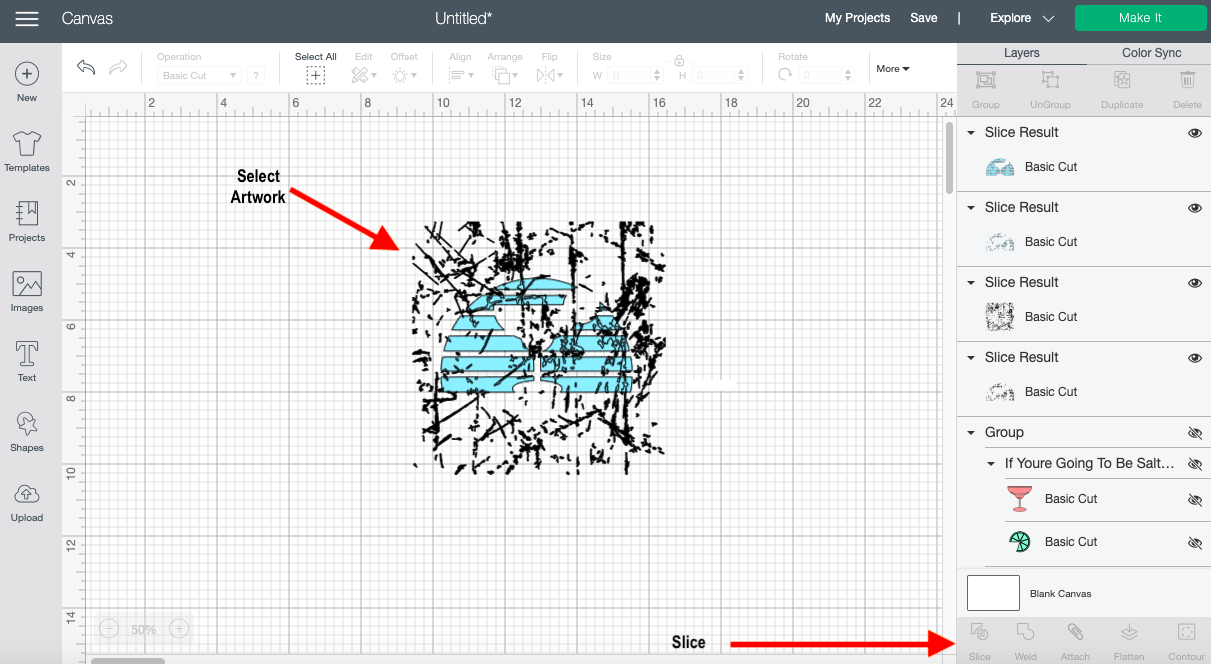
Step 5. Slice Layers
Slice the selected items by clicking on the Slice tool located on the bottom right side of your canvas screen. Finally, pull all the slice layers apart and delete unwanted layers.
This will leave you with the original design with a worn look, which is exactly what we want. If you hid your other layers to your design this is the time to unhide them. Simply re-click on the Eye and your layer will once again appear.
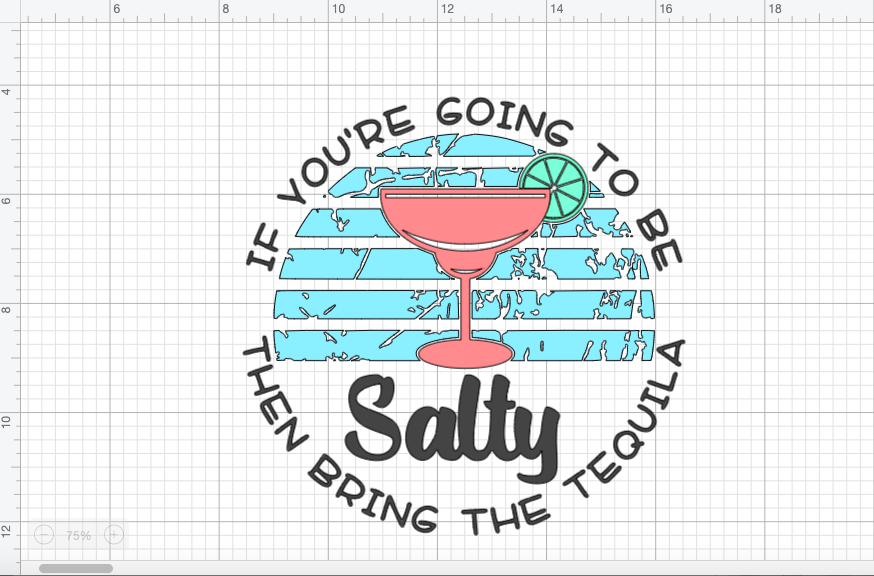
You have successfully created a distressed design!