How To
How to Colorize a Black & White Photo in Photoshop
Jul
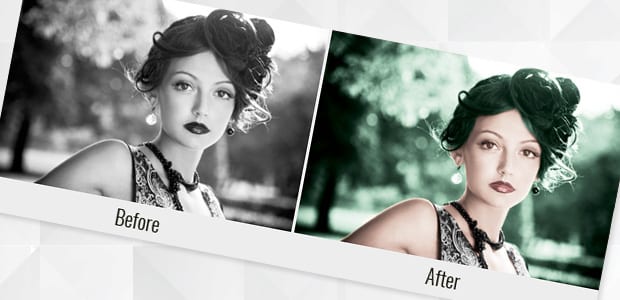
In this enlightening article, we’ll demonstrate how to add colors to your vintage black and white photos using Photoshop. Colorizing black and white images can breathe new life into old memories and bring a fresh perspective to historical photographs.
Follow our step-by-step instructions to learn the techniques in Photoshop that allow you to meticulously colorize black and white photos. Whether you’re preserving family history or reimagining classic images, this tutorial will equip you with the skills to beautifully and authentically add colors to your photos.
Let’s dive into the world of photo colorization with Photoshop and unlock the power to transform black and white images into vivid and vibrant works of art. Get ready to bring your vintage photos to life with the magic of color!
How to Colorize a Black and White Photo
Of course, you must first open your image in Photoshop. If you don’t have it yet, you can get Photoshop here from Adobe’s site here. Their Creative Cloud Plans includes Lightroom and other super helpful software for only $9.99/month.
Make sure to download the newest version of Photoshop so that you can more easily follow along with this tutorial.
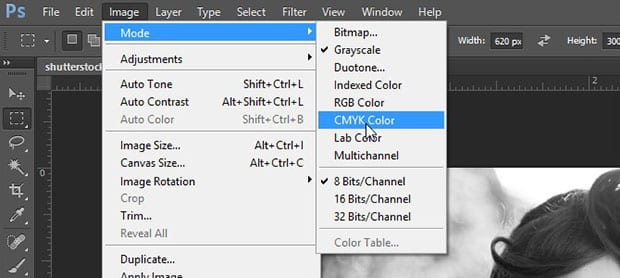
Next, go to Image » Mode » CMYK Color to convert your image into CMYK color.
Then, select the Adjustments panel at the right side of your Photoshop screen and add the Curves adjustment layer. I’ll rename this layer “Skin” by double clicking on the layer name in the Layers panel.
If you don’t see your Adjustments panel docked on your right-hand toolbar, simply go to Window » Adjustments from the top menu in Photoshop.

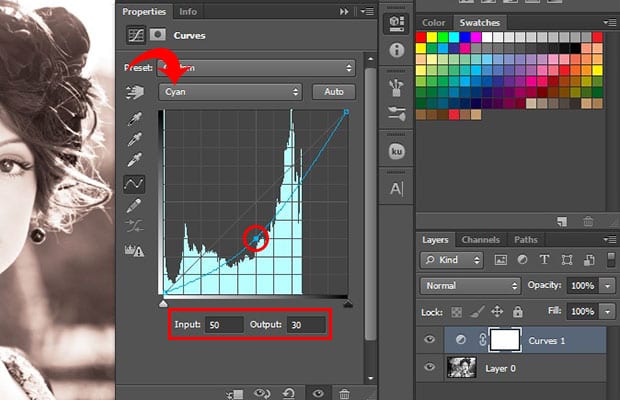
In the CMYK drop-down that appears after you select to apply your Curves adjustment, select Cyan. You can adjust the curve to manipulate the cyan saturation in the image. I’ve set my Input to 50 and Output to 30, because those values work best on my image. Keep in mind that your Input and Output values may differ depending on your photo.
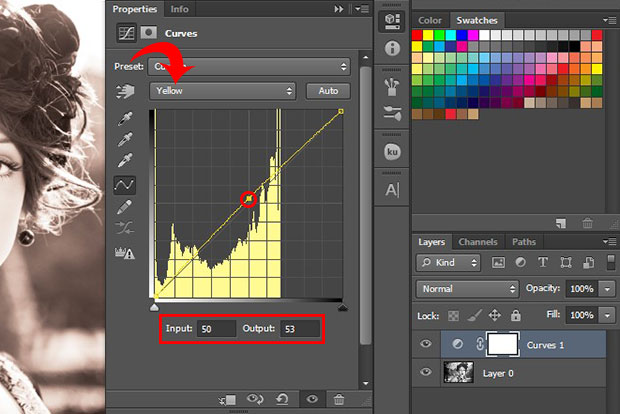
After adjusting the Cyan levels, you should adjust the Yellow levels from the same CMYK drop-down. Adjust the yellows curve until you’re happy with the yellow saturation. For my image, I settled on an Input value of 50 and an Output value of 53.
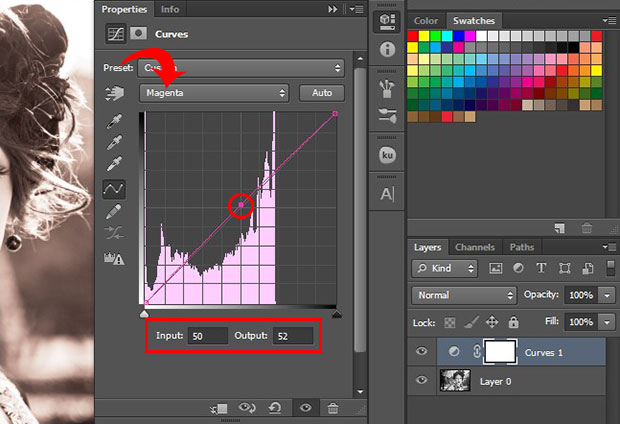
Next, choose Magenta from the CMYK dropdown. Adjust the magenta curve in the same way that you did the yellow and cyan curves.
Now, click on Curves adjustment layer in the Layers panel and apply a Layer Mask. Then, select Invert in the adjustment layer when you paint on the mask. Make sure to select Invert in the the adjustment layer when painting on the layer mask.
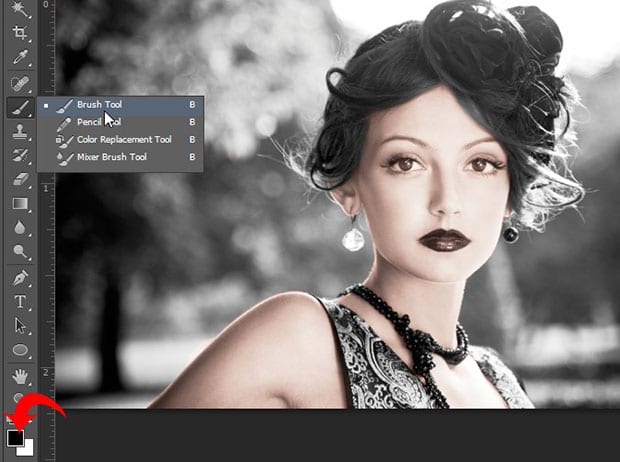
Select the Brush Tool from the Toolbar and set the foreground color to black. Then, brush over the skin of your model to reveal the colorized skin you created. Be sure to zoom into the photo to achieve perfect edges.
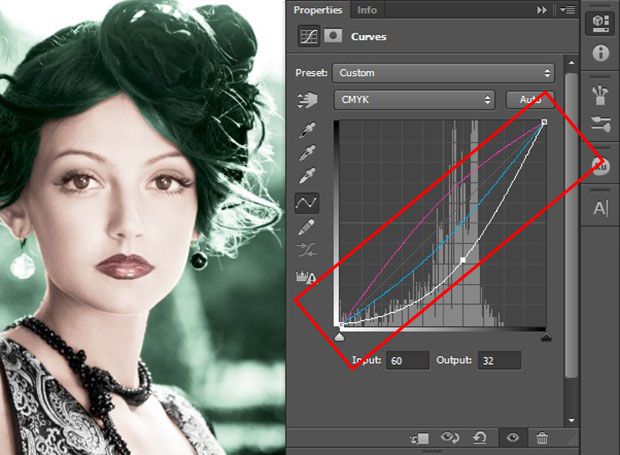
Once you are done with the skin, you can now repeat the same process to colorize other parts of your image. You can also use Curves to tweak any naturally black or white parts of the photo, including the hair, eyes and highlights and shadows.
In this photo, we used Curves adjustments to colorize the eyes, hair, lips, jewelry and background in the photograph. We also added an additional layer to adjust the lips. Make sure to create a new Curves adjustment layer each time you colorize a new portion of the photo — and label them!
That’s all! You can see this before and after comparison below:
