How To
How to Use Point Editing in Silhouette Studio
Aug
In this informative tutorial, we’ll explore the powerful feature of Point Editing in Silhouette Studio, which enables you to make precise modifications to lines or curves in your designs. Using nodes, you can manipulate and transform the shape of your design by moving, resizing, and more.
Follow our step-by-step instructions to learn how to effectively use Point Editing in Silhouette Studio to achieve the desired alterations in your designs. This feature is invaluable for creating custom and intricate designs, allowing you to fine-tune every detail with ease.
Let’s dive into the world of Point Editing in Silhouette Studio and unlock the potential to craft with precision and creativity. Get ready to elevate your designs and take full control of your crafting projects!
Accessing Point Editing Menu
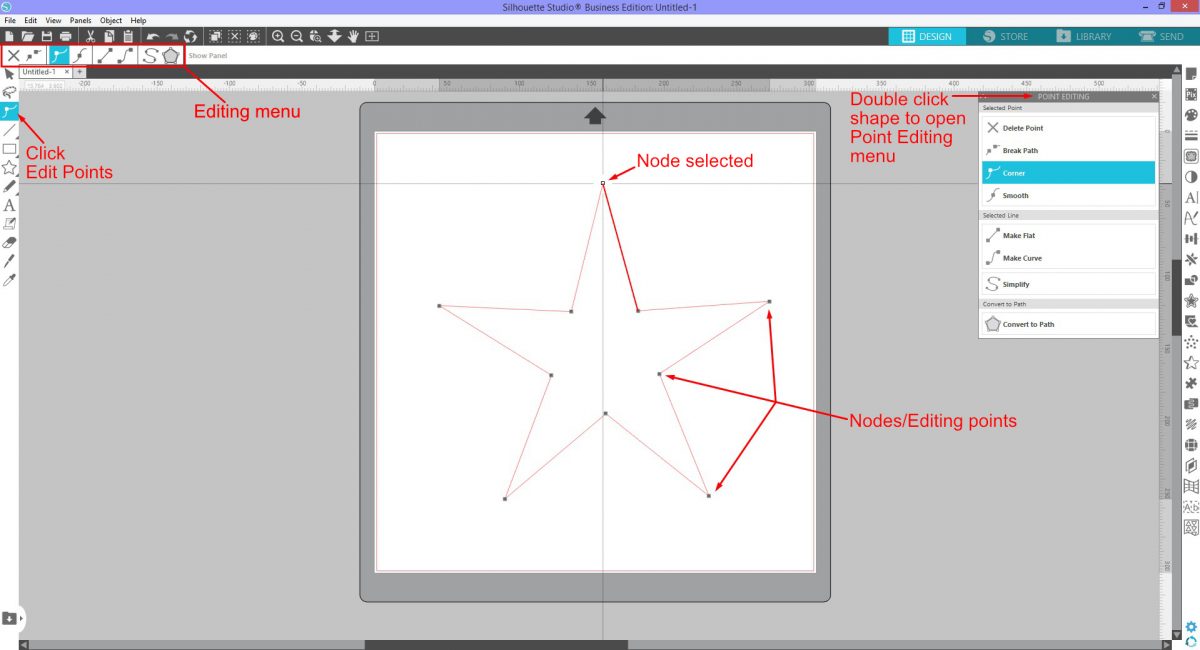
The Point Editing menu can be accessed one of two ways. You can click the tool on the left side panel or double click the shape. If you click on the tool the editing options become available at the top left of the screen. Double clicking on the shape opens up the editing menu on the right hand side.
First, we will need to draw out a shape and convert it to a path in order to use the Point Editing tool.
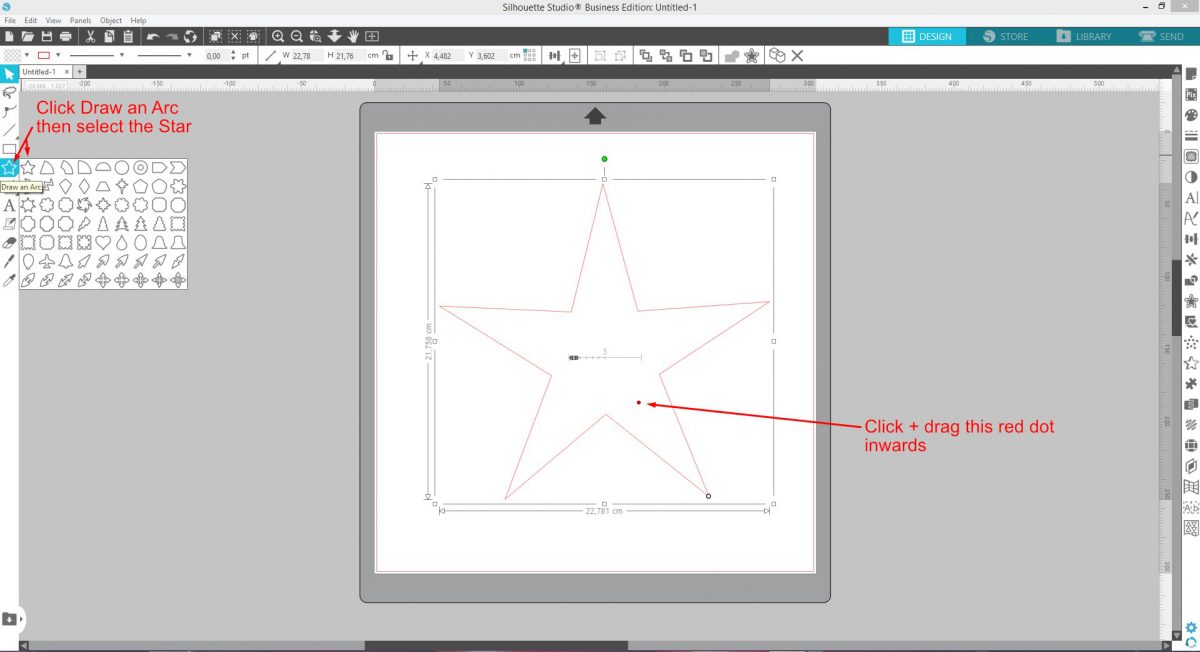
The Star shape from the Flexi Shapes menu will be used. Click on the Draw an Arc tool and select the Star. Click + drag out the shape then click on the little red dot and drag it inwards. This will create a pointed Star. Right click and select Convert to Path.
Double click the shape to access the Point Editing tool. Alternatively, click on the Edit Points tool. Nodes are automatically placed at all corners.
Point Editing Menu Options
Each point or node can be edited independently. This allows for great flexibility in modifying a design. Let us explore the editing options that are available.
Delete Point
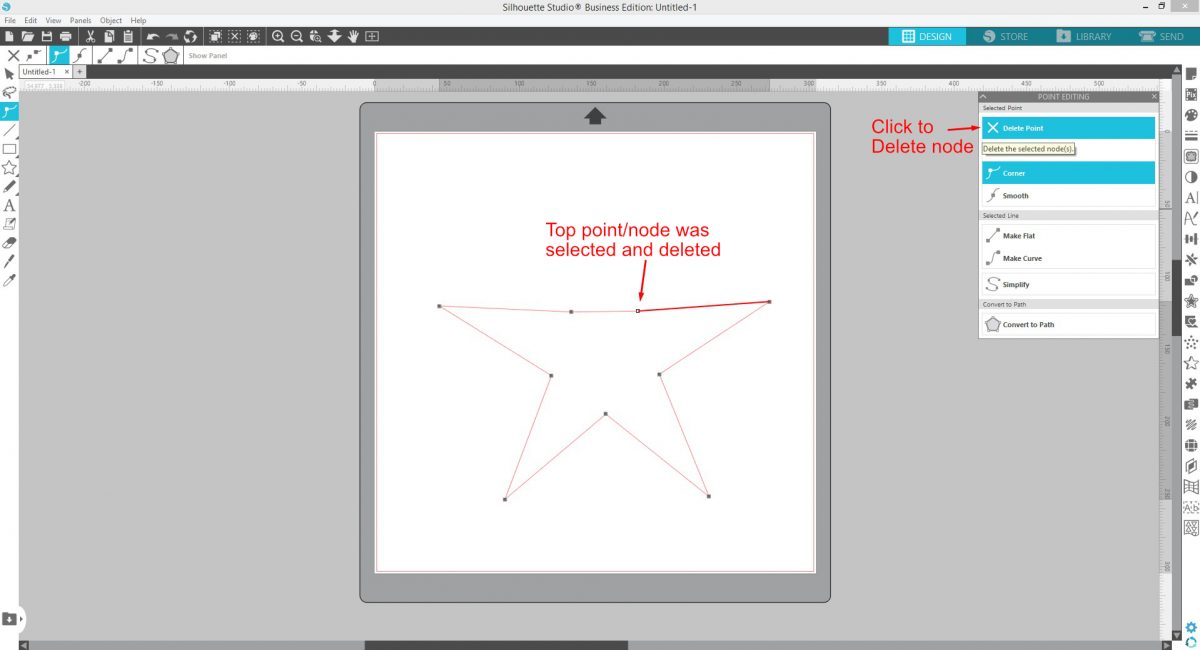
As the name says, this is used to Delete a point. You would delete a point to change the shape or to remove excess points that may have been automatically added. Click on a point to select it then click on Delete Point under the Point Editing menu.
Multiple nodes can be deleted at once. Hold Shift + click on the nodes to select then either click Delete Point or press Delete on your keyboard.
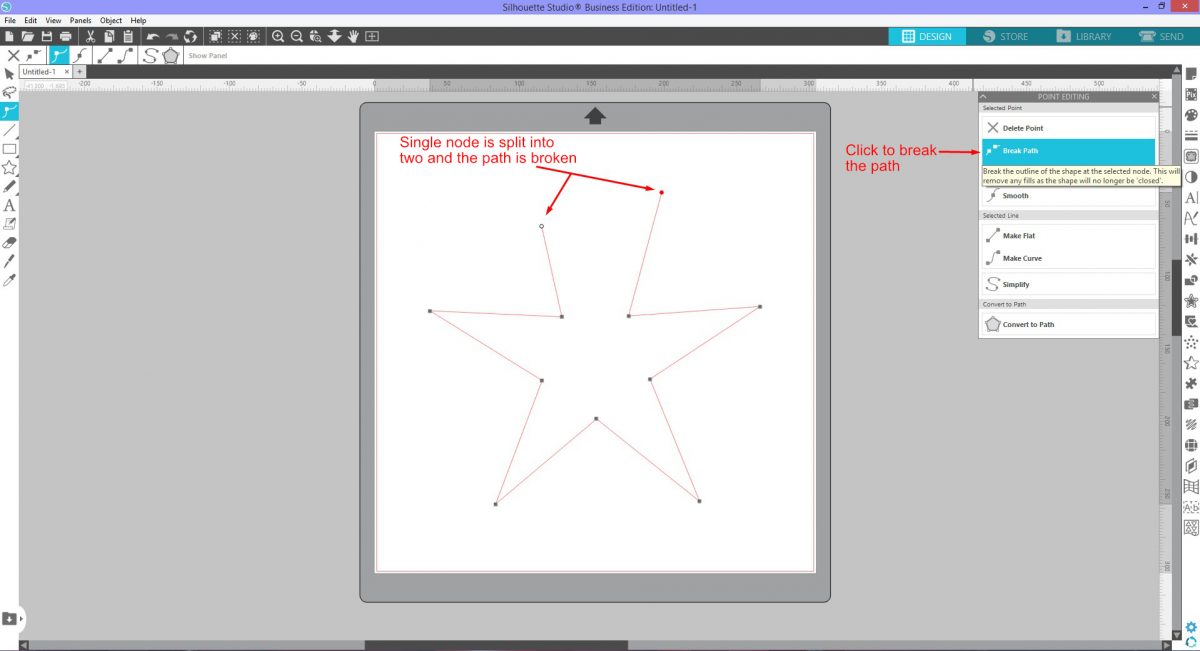
Break Path
Breaking the path is where one point is broken into two. This is also called an open path. The nodes can be moved apart, deleted, joined to other nodes and more. Click on a node and then click Break Path. The little square will become two red points and this indicates an open path. Select the node by clicking and dragging to the side.
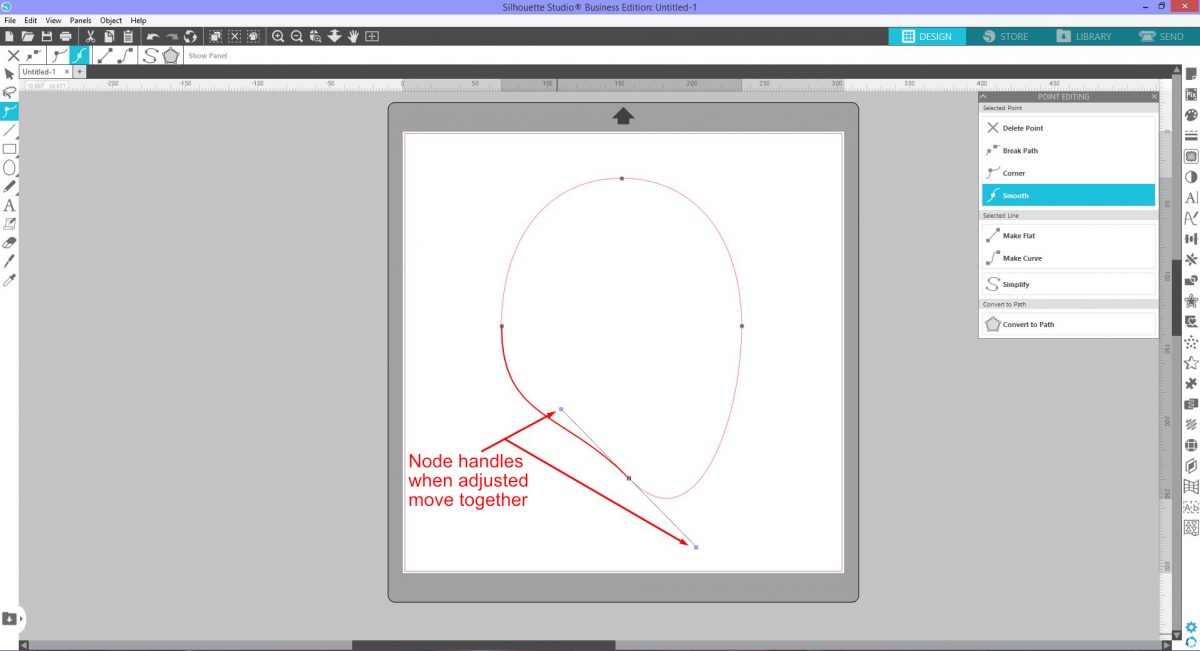
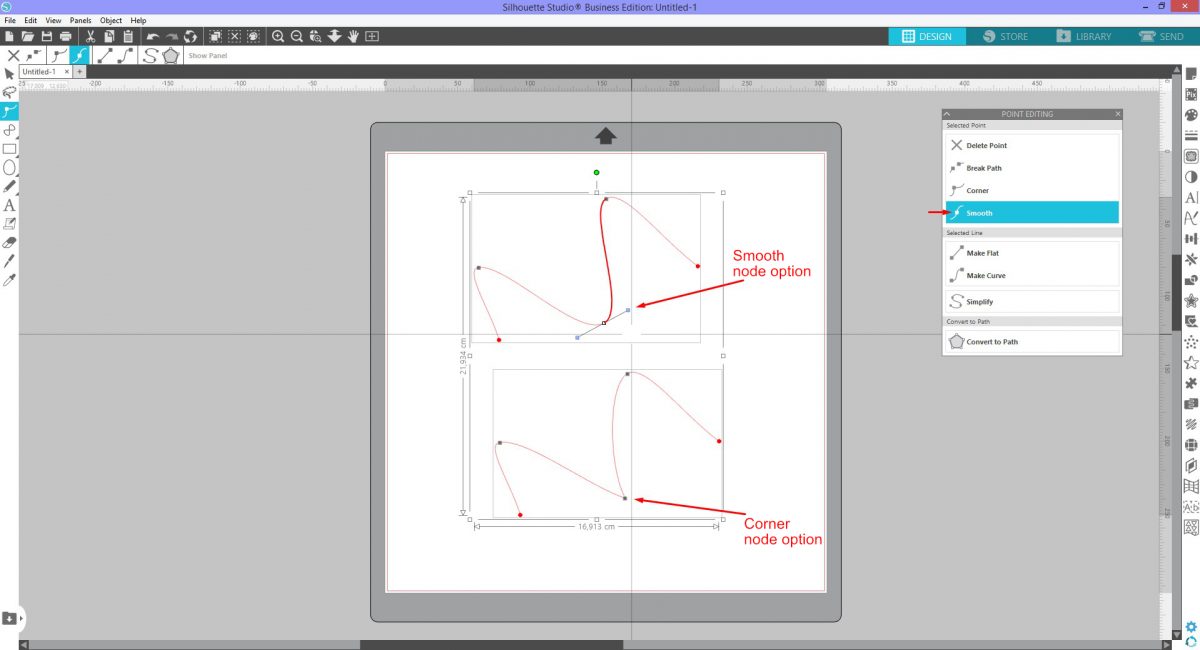
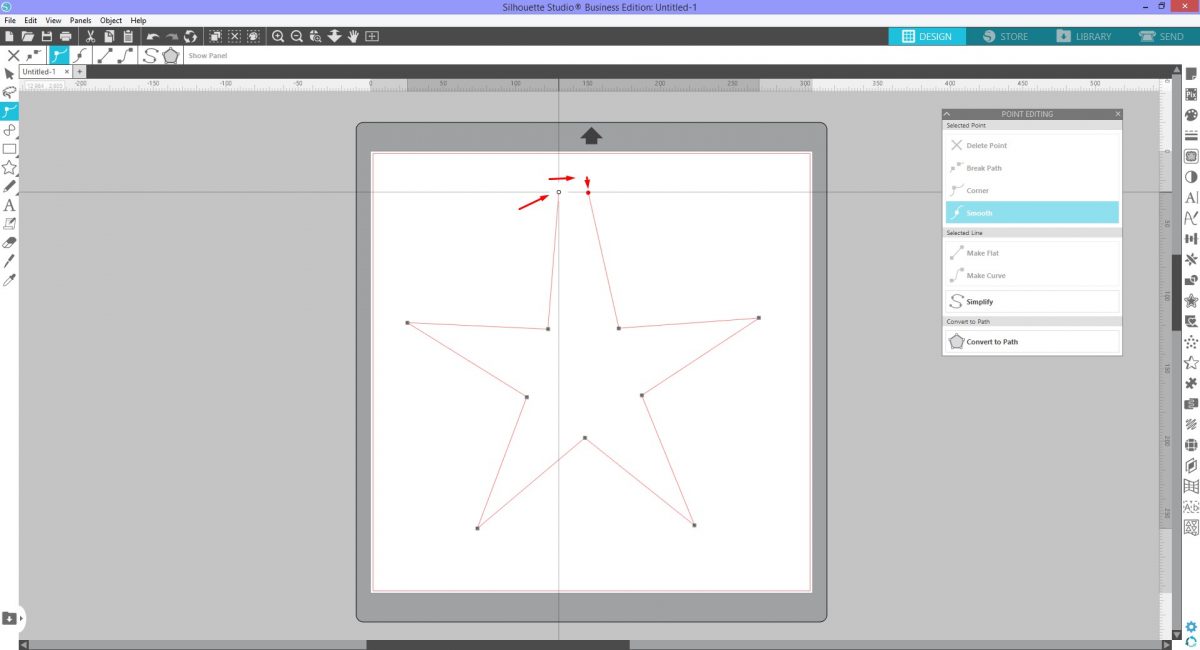
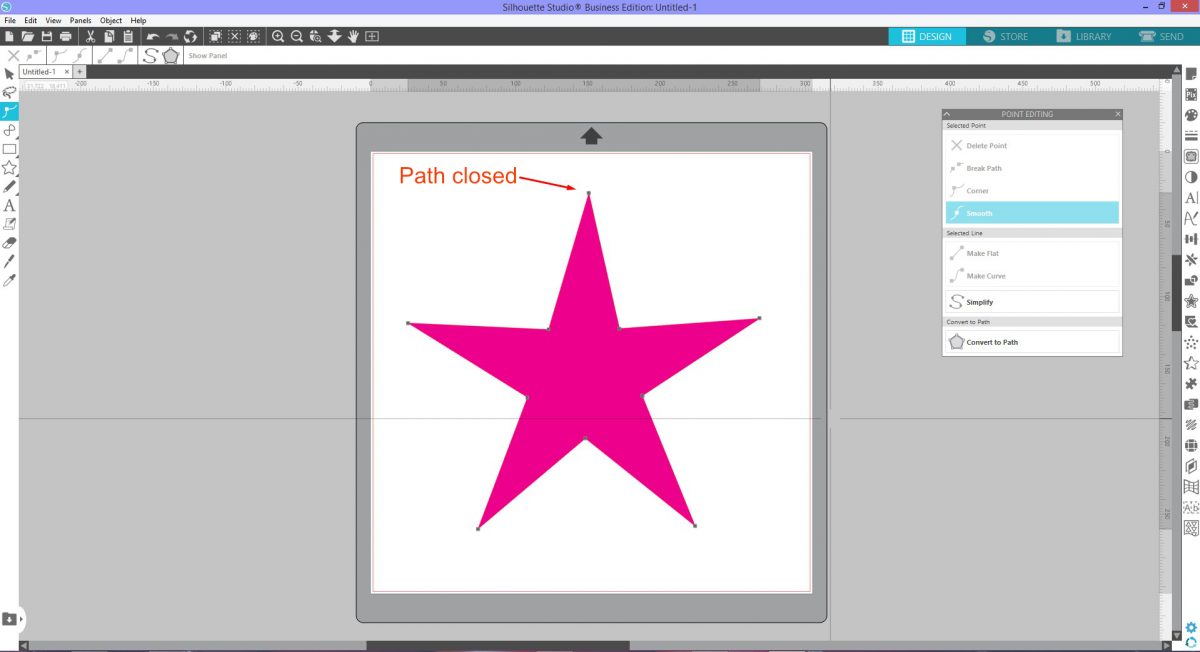
Corner and Smooth
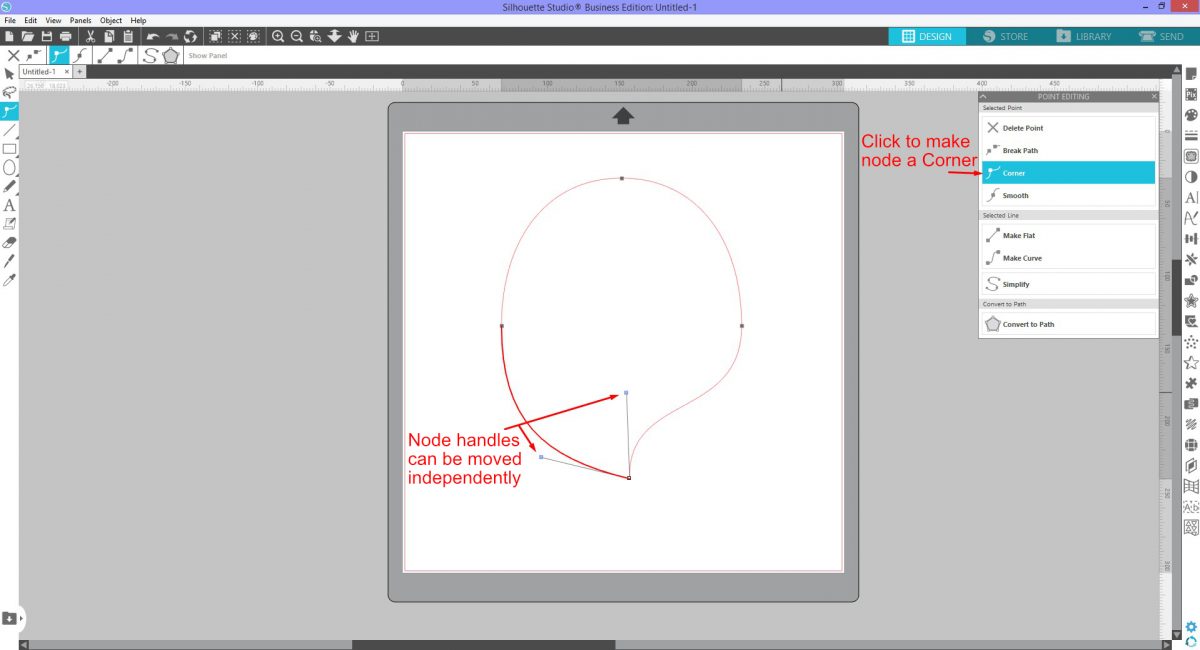
When using a pointed shape like the Star, the nodes are automatically turned into Corner nodes. This means that the node has a sharp transition when changing direction. Nodes have handles for further adjustment. The Corner node option, when used, will allow you to move each handle on its own.
A better example is a circle with a Smooth node. As you adjust the handles, they move together.
With the Corner node option applied, the node handles can be adjusted independently.
The Smooth option does the opposite of the Corner option. When applied, the node is smoothed out with the handles moving in relation to each other.
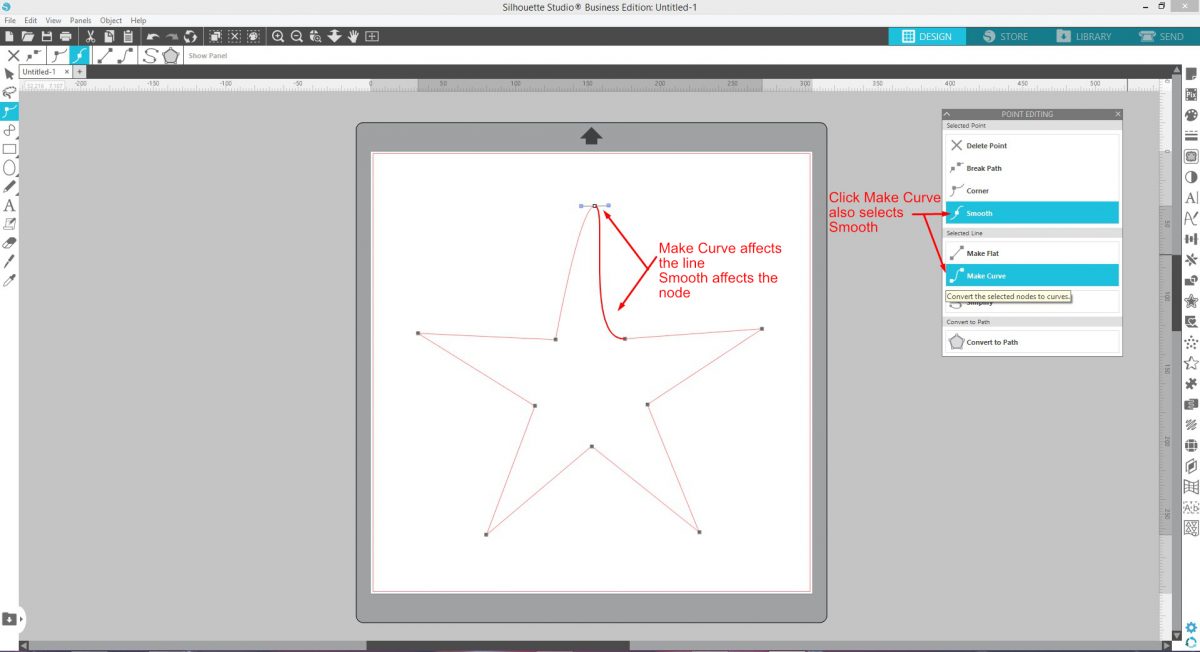
Make Flat and Make Curve
These two options change the selected line between two nodes. Make Flat will flatten the line if it is curved while Make Curve will do the opposite. Make Flat is useful for hand drawn shapes that might be a little wonky where you want a straight line.
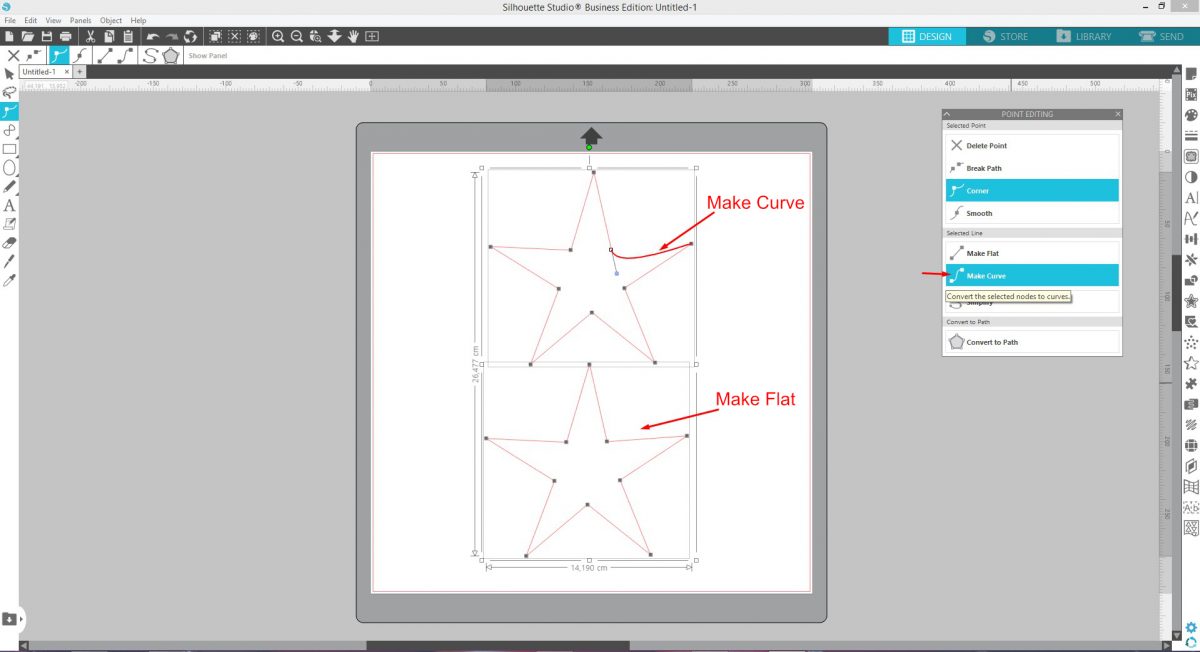
Make Curve, when applied may automatically apply the Smooth option as well.
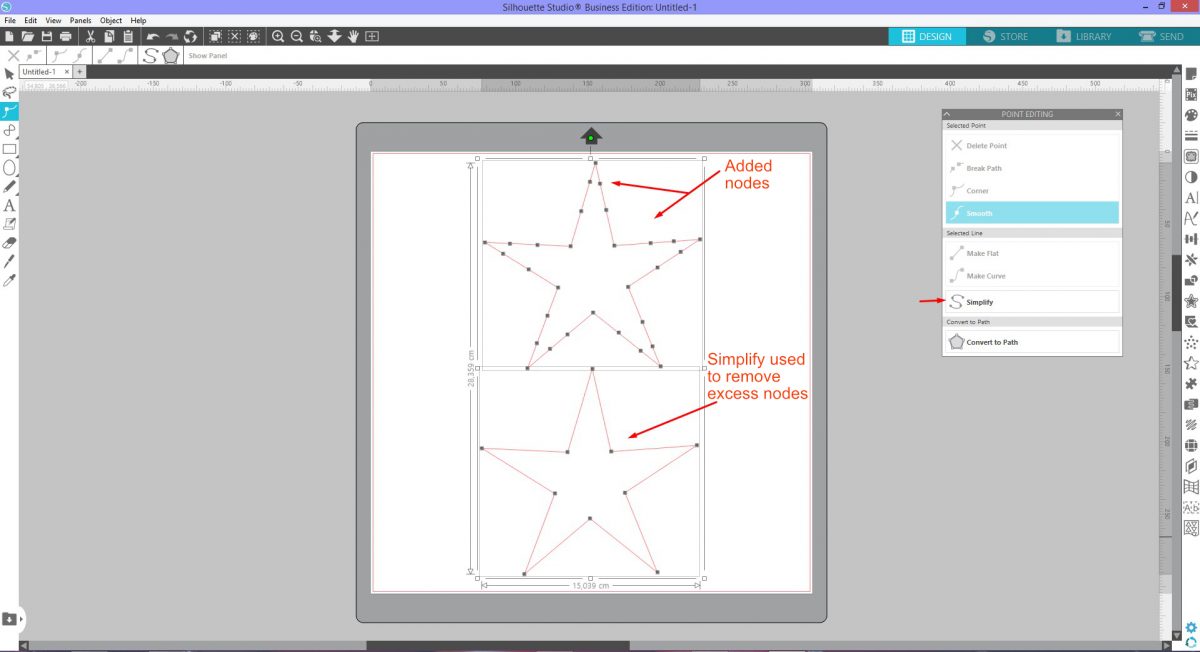
Simplify and Convert to Path
Some designs may have a large amount of nodes that make it difficult to cut. We will discuss how to use Simplify with a more complex design later on in the tutorial. In basic terms, Simplify removes excess nodes that may appear.
In order to use the Point editing tool the shape or design needs to be converted into a Path. After drawing out a Flexi Shape you can click on Convert to Path instead of right clicking the shape.
Broken Paths
At some point in creating a design you may run into a broken path. You will know the path is broken by the red points mentioned under Break Path. When the path is broken the shape cannot be filled with a color, gradient or pattern. This is due to the shape now having a gap and when a fill is applied nothing will happen.

As long as you have two open ended paths as seen with the red points, you can join them. Click + drag one red point onto another and they will automatically be joined. The path will then be closed. If you had selected a fill it will now show. If no fill was selected you can choose a color from the Fill Panel on the right hand side.
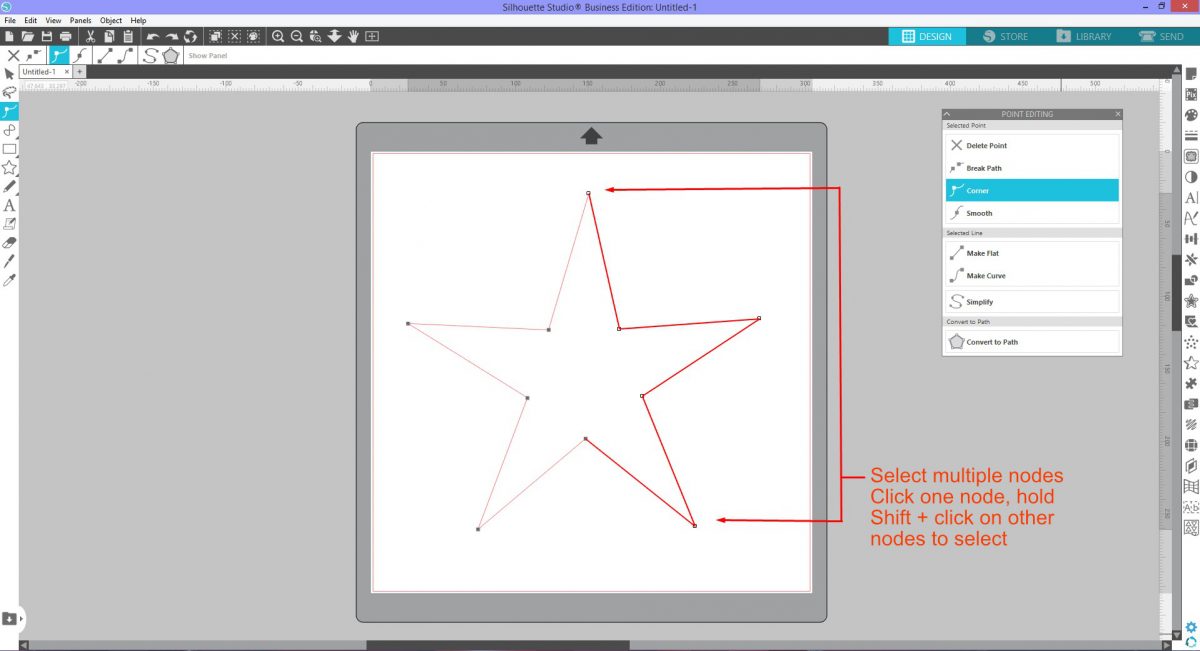
Multiple Point Selection
Multiple points can be selected and edited or deleted at any point. This may help when wanting to adjust a larger part of the design at once. To do this, click one node to select then hold Shift + click on surrounding nodes. Alternatively, hold Shift + drag a selection box around the nodes. The nodes within the area will be selected.
All the selected nodes can be edited together. For example, if Make Curve is selected, all the nodes will become curved areas.
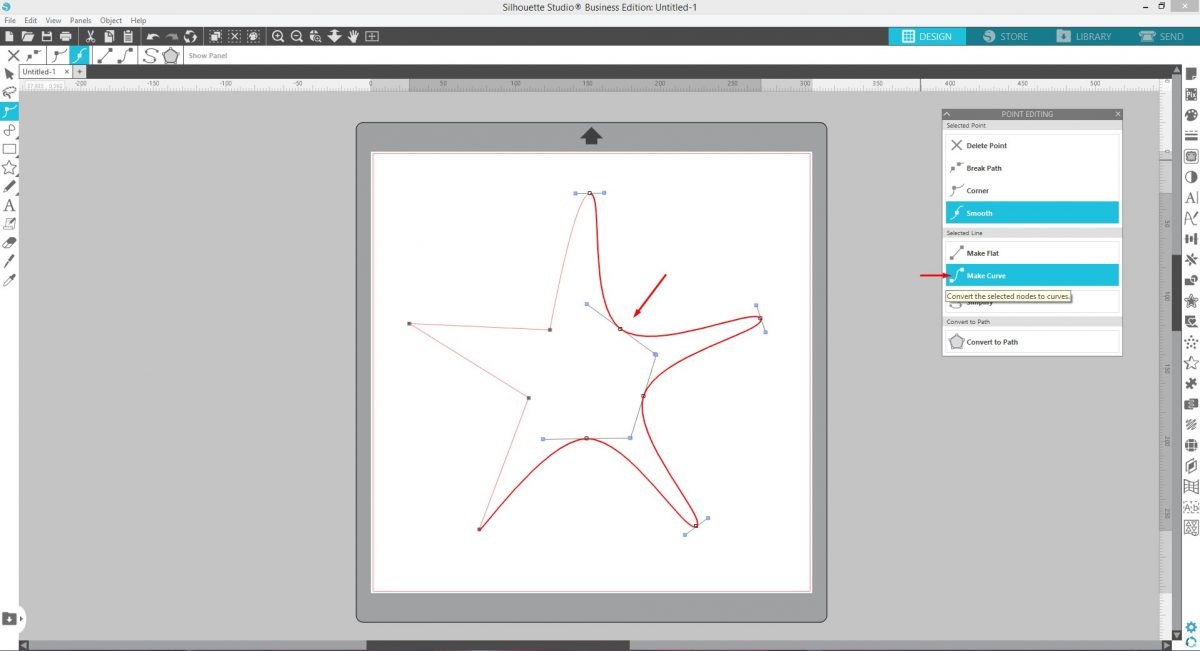
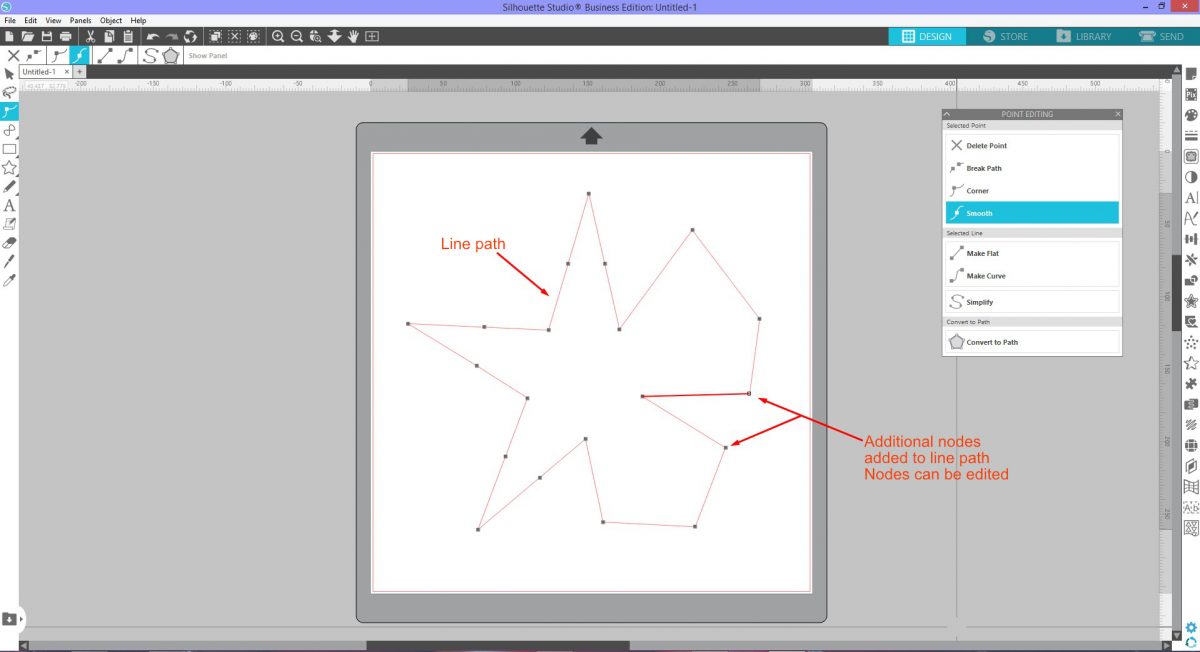
Further nodes can be added to the shape. Place the mouse over one of the line paths. When it changes to an arrow with a line, click once to place a node. Each node can be modified however you choose.
Simplify a complex design
A more complex design can have a large amount of nodes. Too many nodes can cause the software to process slowly. This is where the Simplify option can be beneficial. An excess of nodes may also appear when tracing an image.
For this example we will use a Welcome PNG image from the doormat SVG bundle. Open the PNG file in Silhouette Studio and use the Trace Panel to trace the design. Next, delete the image so you are left with the traced red cut lines. Double click to open the Point Editing menu and to see the nodes.
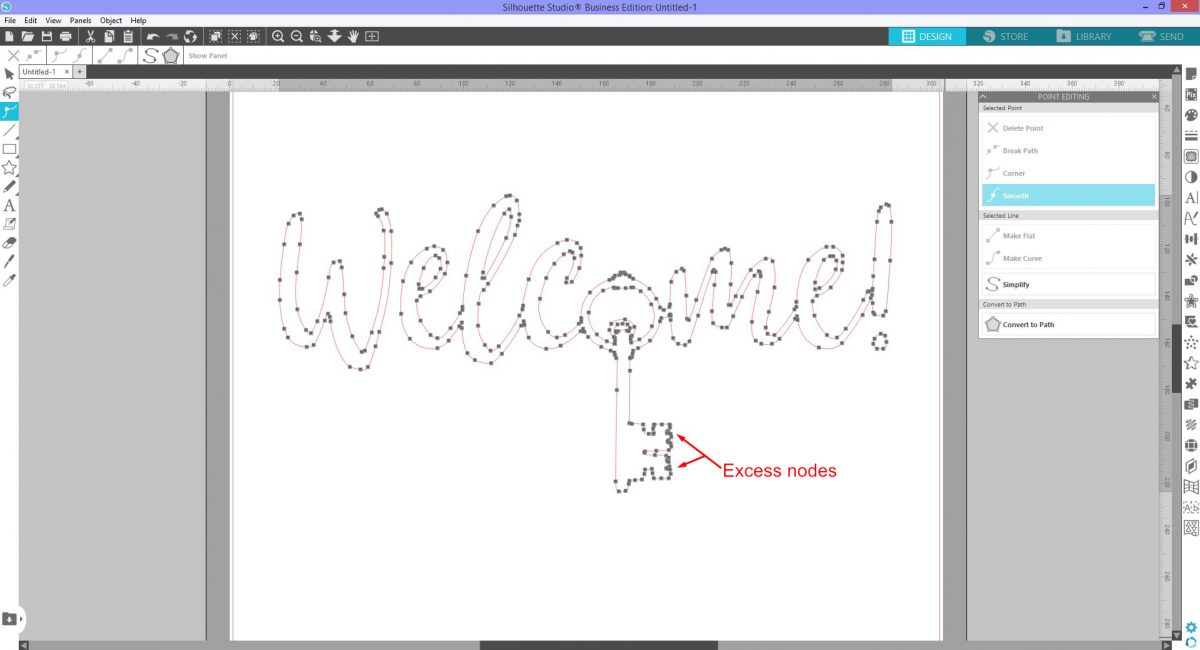
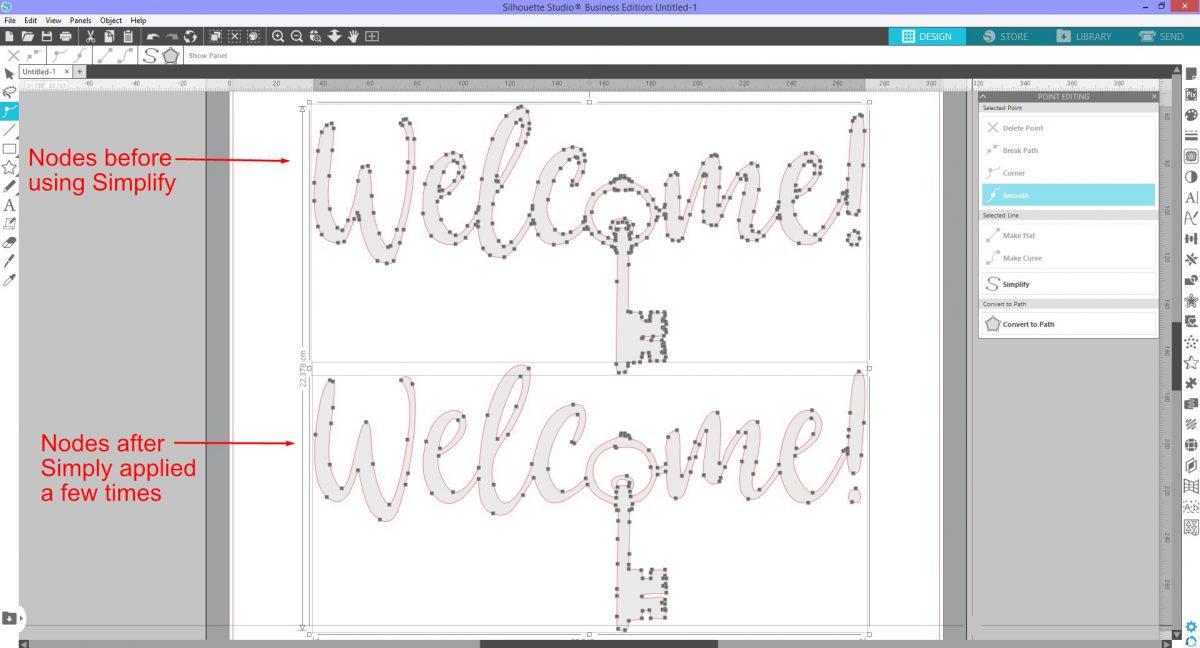
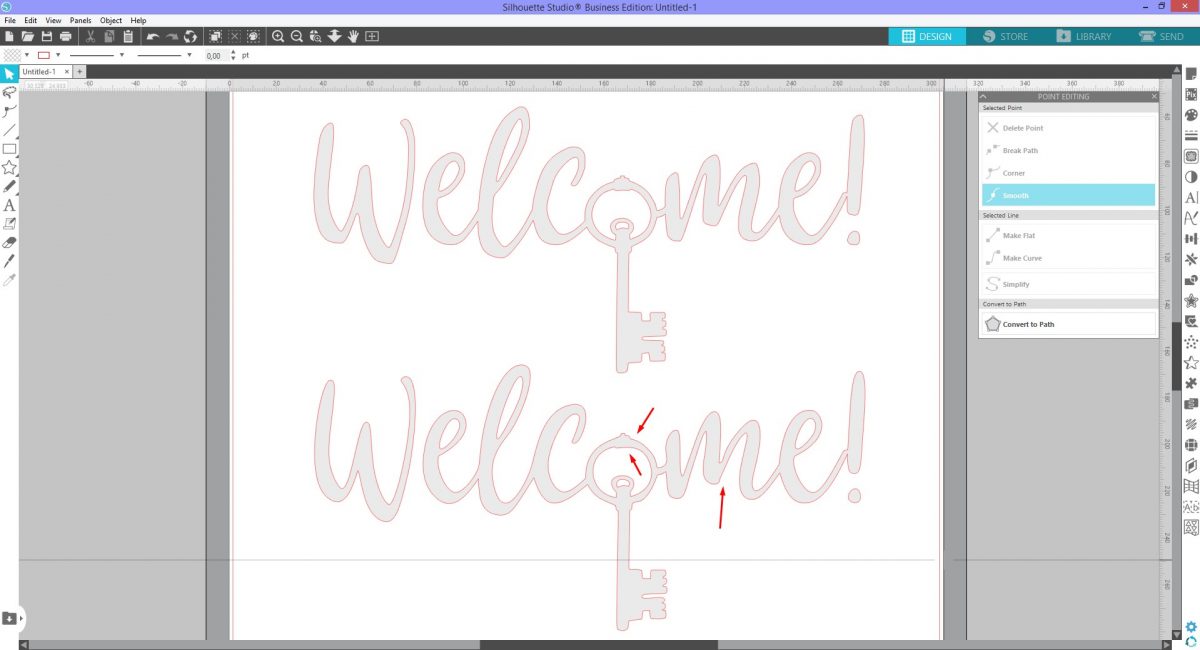
If needed you can add a fill to better see the nodes. Under the Point Editing menu click on Simplify. The amount of nodes will be decreased. You can click Simplify more than once but as more nodes are removed detail can be lost. This can cause some distortion in your design.
Point Editing on images
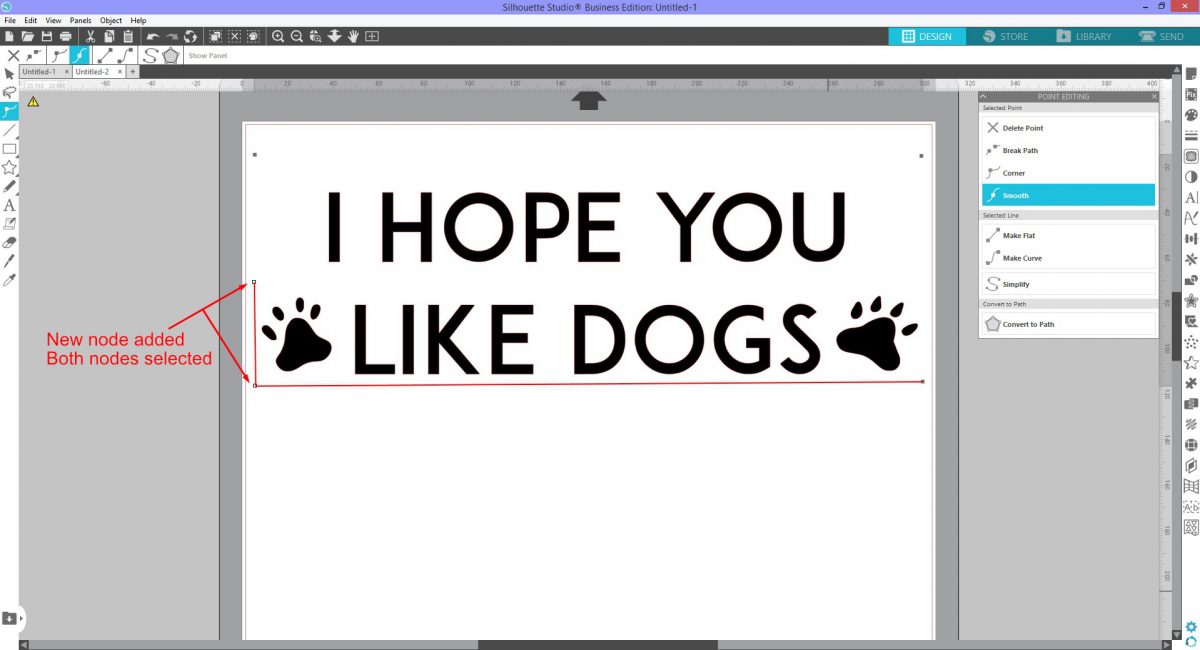
Point Editing is not just for editing cut lines. It can be used in a similar way to cropping. Open your image in Silhouette Studio then double click to access the Point Editing tool. Four nodes will appear on the corners of the image. Click on the top left corner then Shift + click on the top right corner to select.
Next, use your keyboard arrows to move the selected corners down to ‘crop’ the top part of the image.
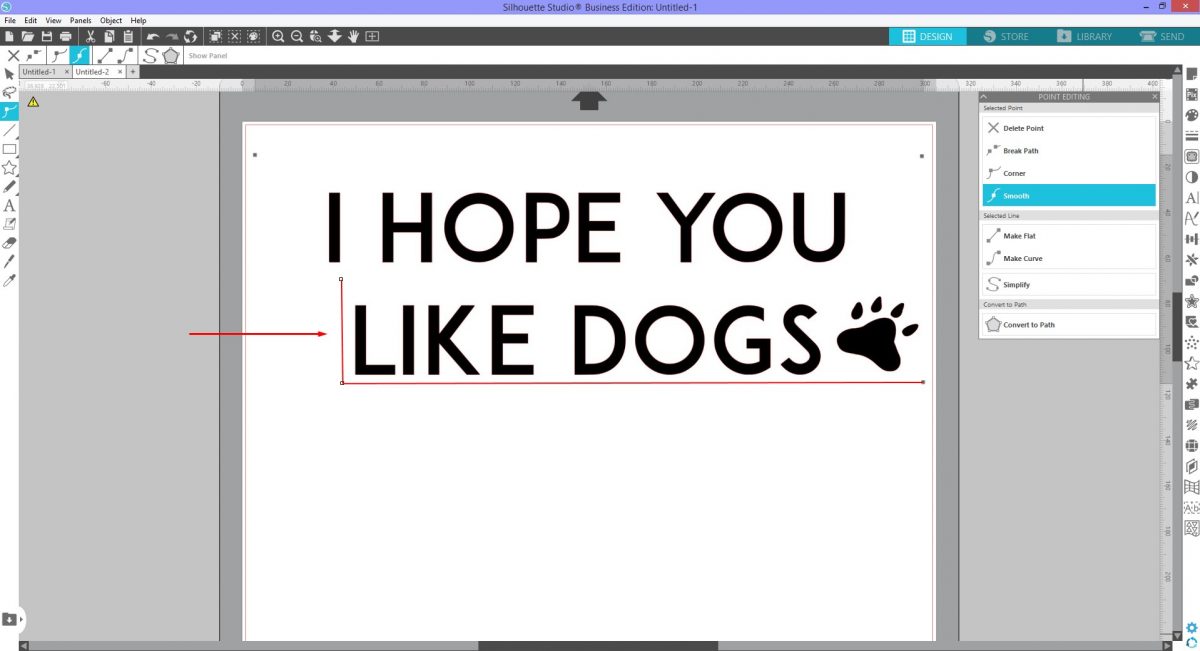
Even though it appears to have cropped the image, the entire image is still there. You can reveal the entire design by reselecting the nodes and shifting them back up.
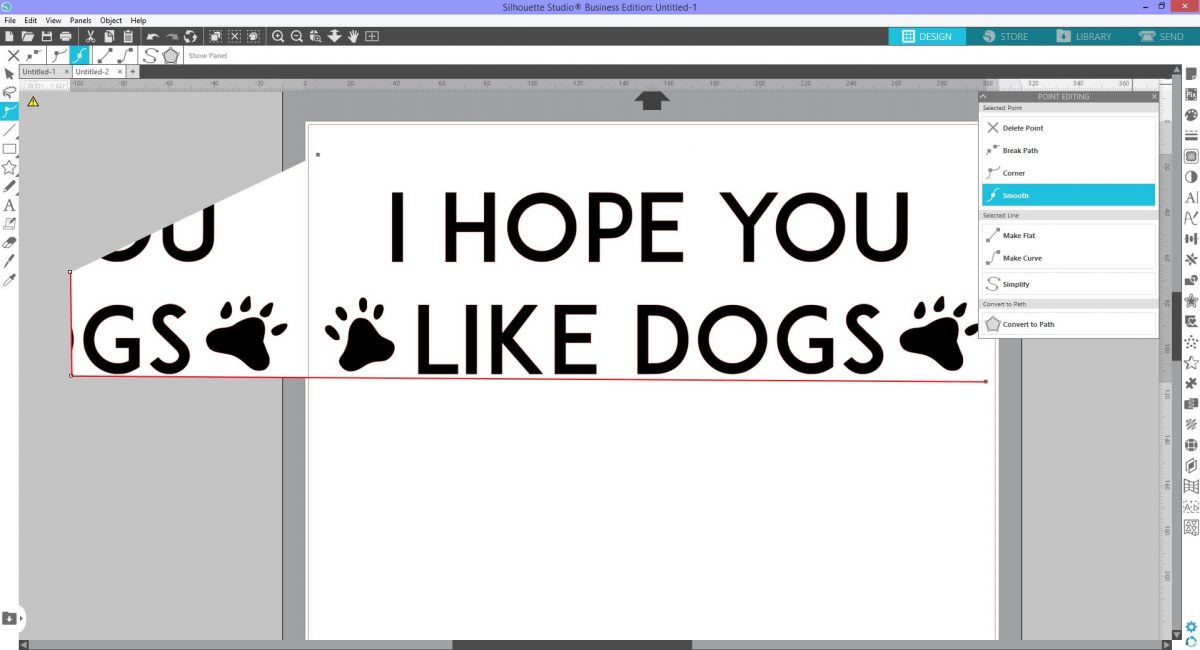
Nodes can be added to the image in case you want to only remove a select area. Click to place a new node, then select the nodes you want to move. Either click + drag the nodes or use your keyboard arrows and ‘crop’ that area.
Point Editing does have a tendency to repeat the image if the nodes are moved in the opposite direction. This can be more of a creative choice but that is up to you.
Point Editing is an awesome tool for editing your images once you get the hang of it. While it’s not one for the beginners, it is a tool you will definitely want to learn more about.