How To
How to Use SVG Files in Cricut Design Space

Jul
1- Ensure your SVG file has been unzipped on your PC. If you are unsure how to do this, we have a guide on how to unzip a zipped file on your PC.
2- Open Cricut Design Space. Create a new file or open an existing one.
3- Select the Upload Images icon that is on the left toolbar.

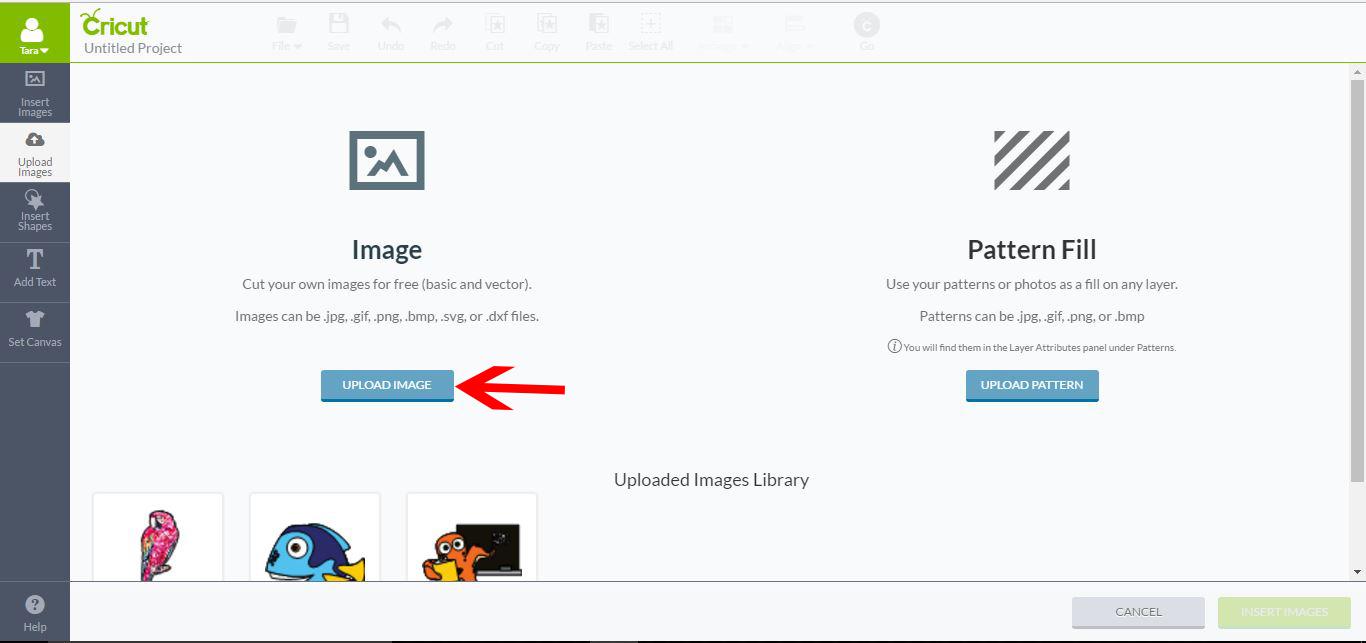
4- In the new window, select Upload Image.
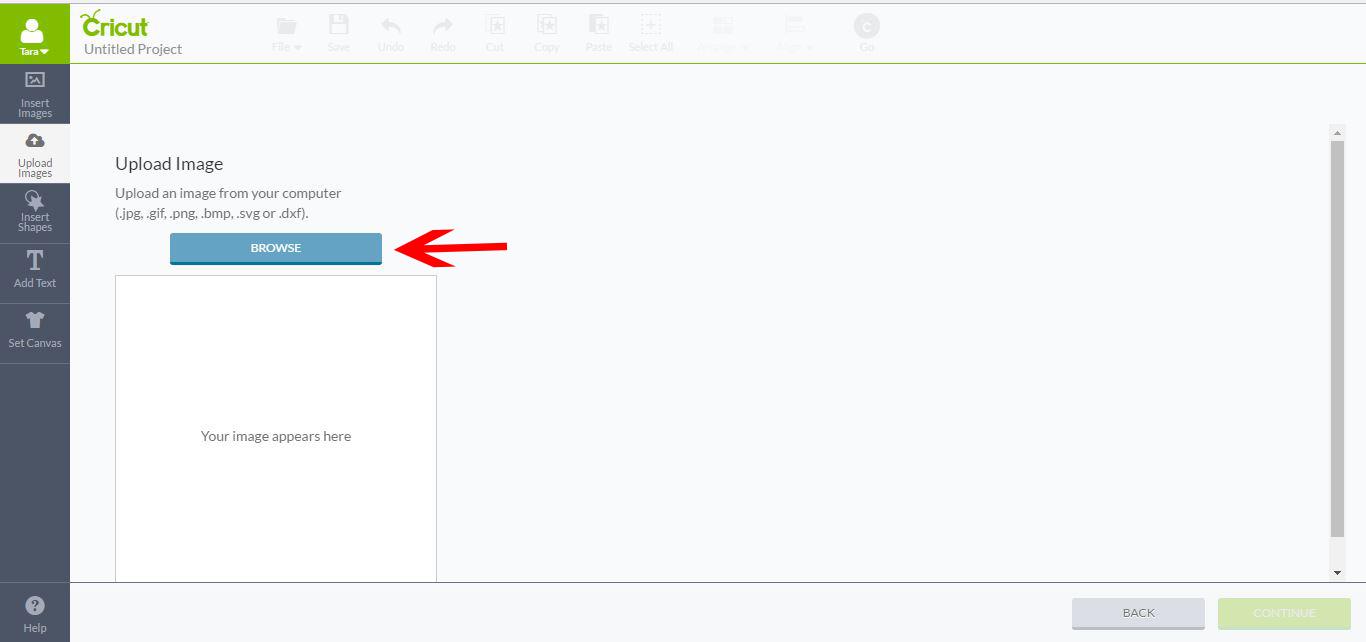
5- Then click Browse.
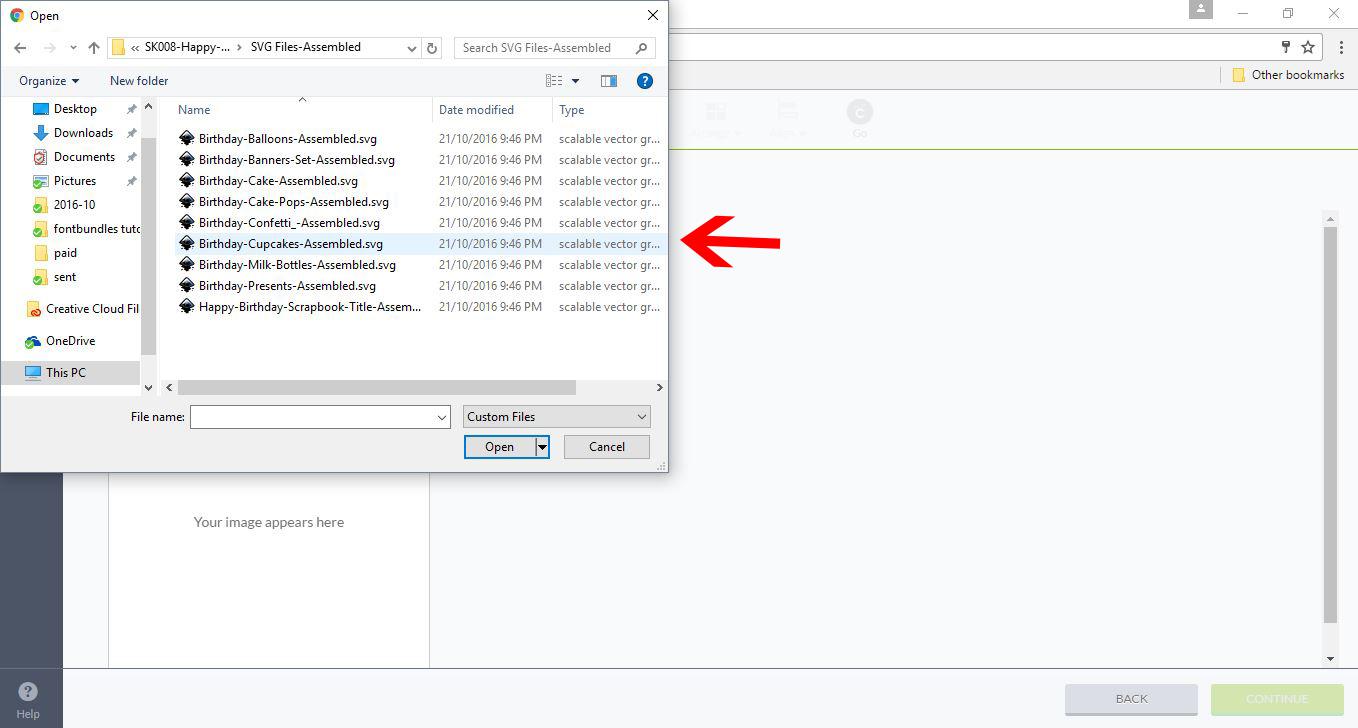
6- Browse your files and open the SVG file you require.
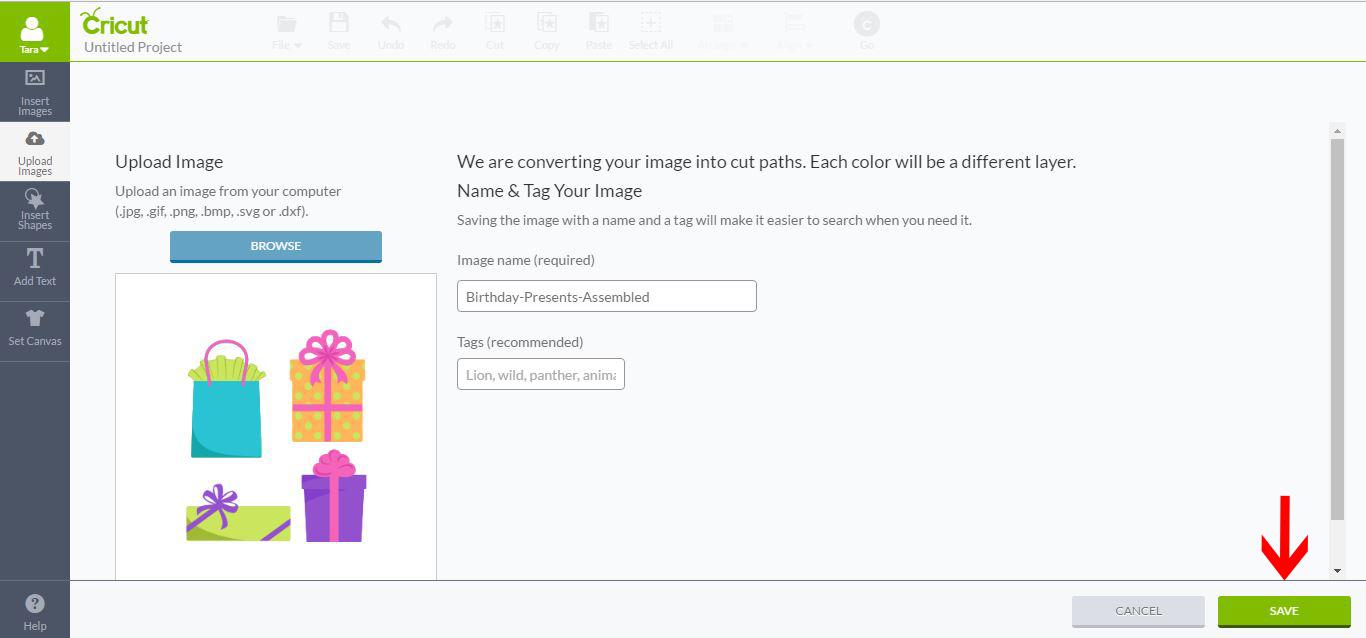
7- Your SVG file will appear in the left box. At this point, you can rename the file or add tags to it so you can find it at a later date. Once you have named your file and tagged it, click Save in the bottom right corner of your screen.
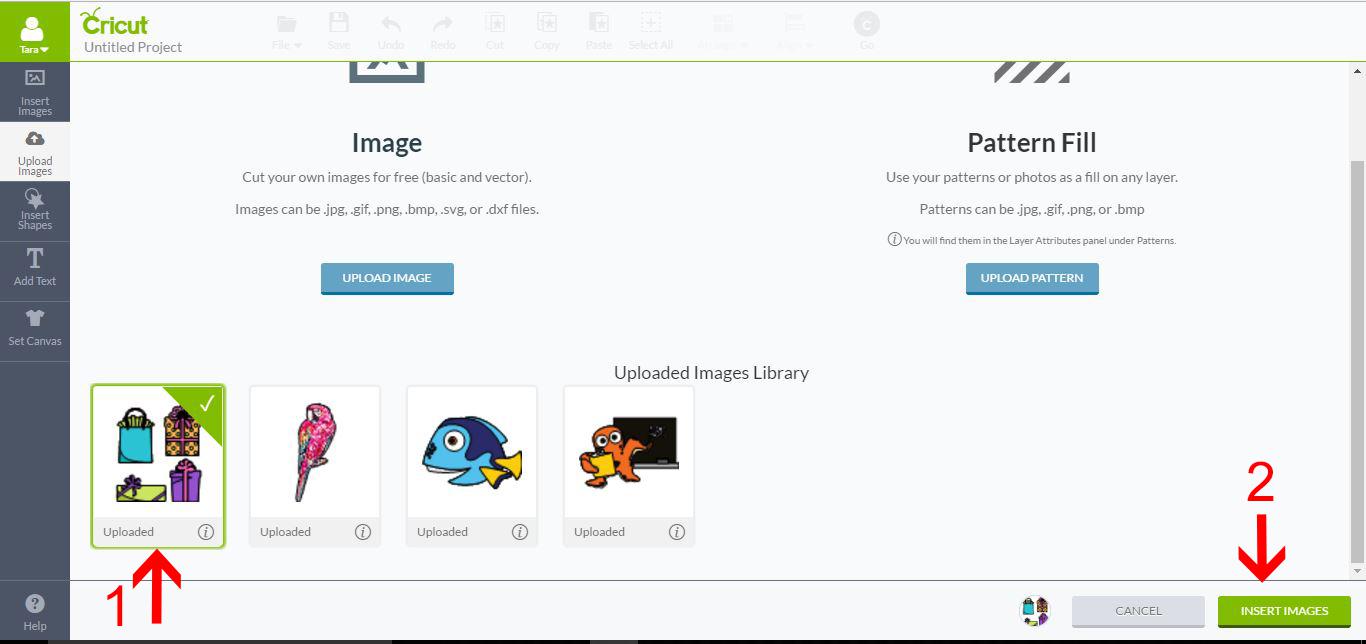
8- You will then be forwarded to another screen. At the bottom, you will see recently uploaded images (1). Select your file and click Insert Images (2).
9- Your SVG file will now appear on your design space.
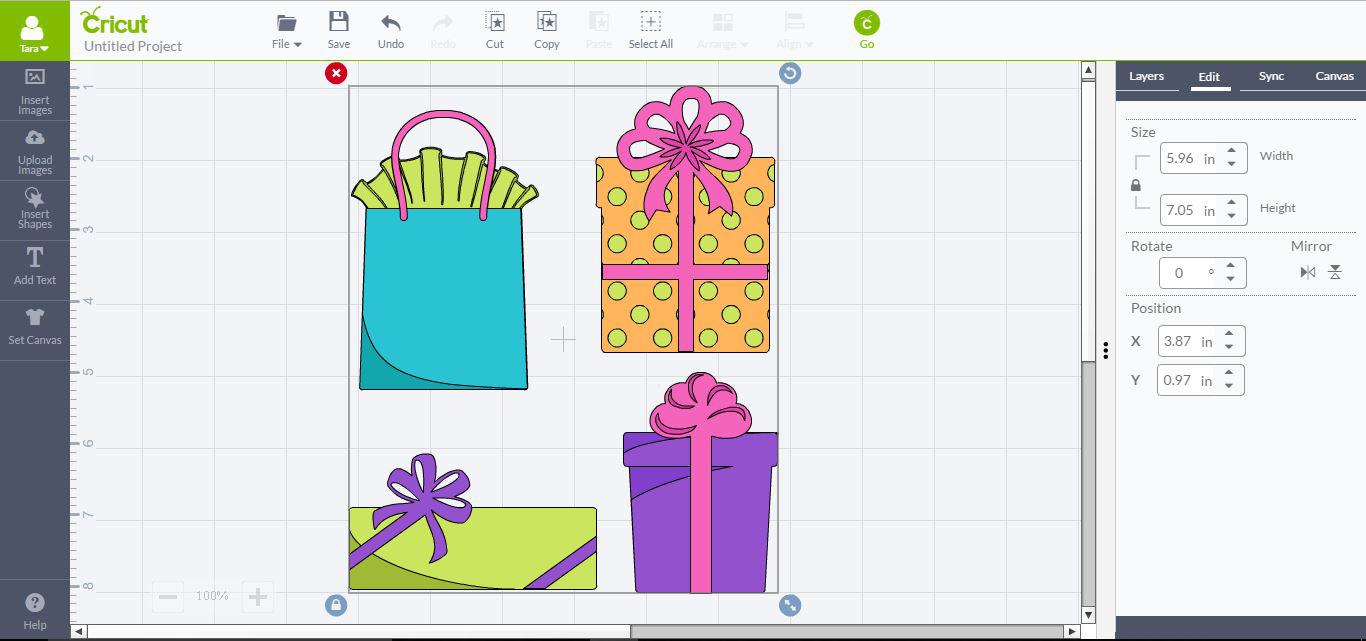
10- You can now cut your file. Click on the Cricut Go button, and the software will separate the colors and prompt you to cut each part separately.
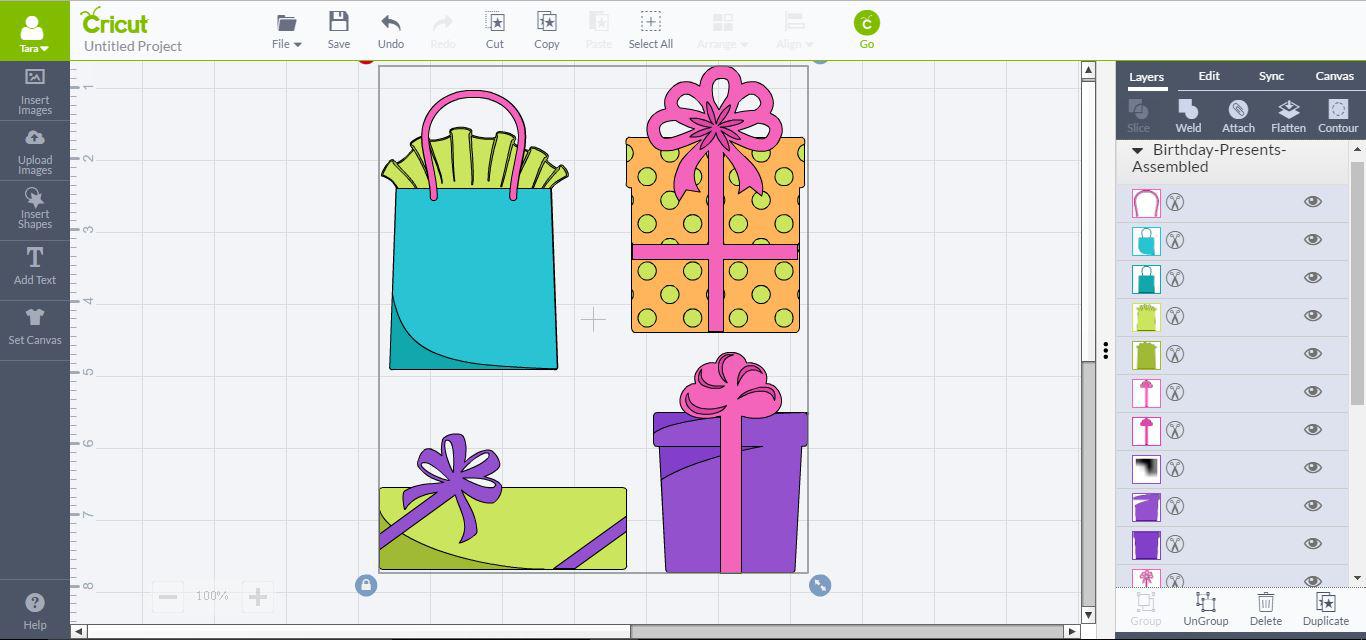
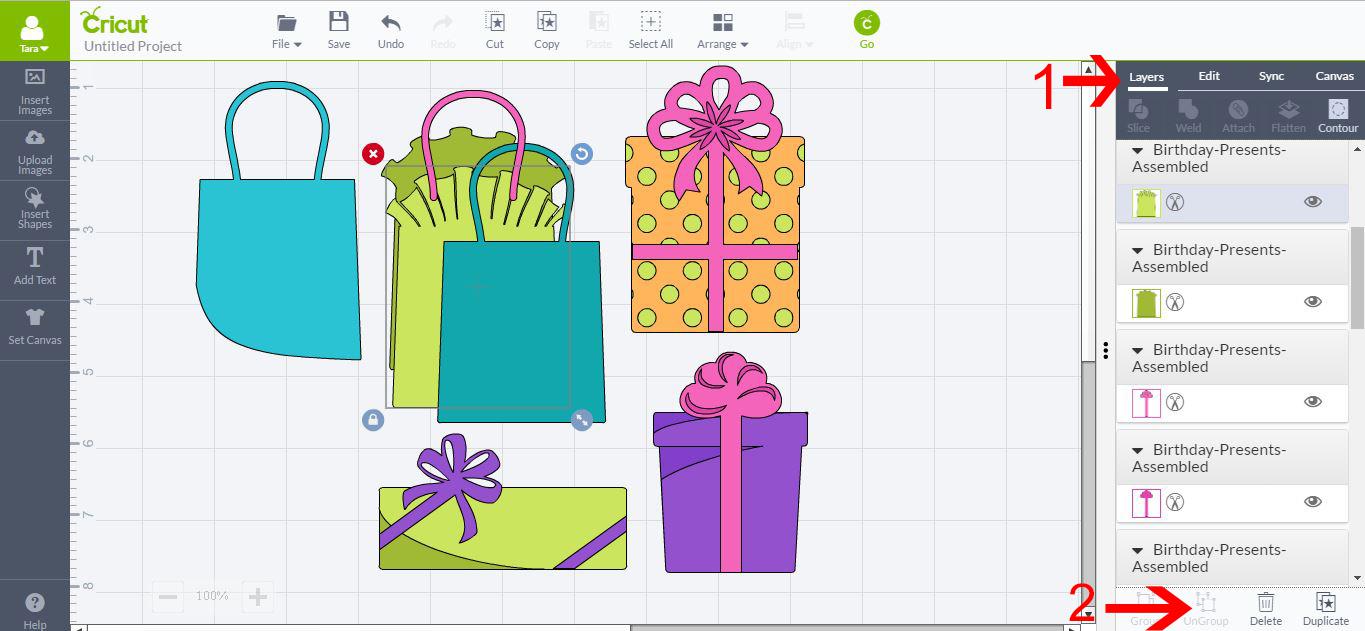
11- Alternatively, you can click on the Layer’s tab (1) and then ungroup your SVG file (2). By doing this, you can adjust each part of the SVG file, such as changing its color, size, and even whether it will be cut/printed/embossed/etc.